WORK IN PROGRESS
Doing any form of engine swap requires basic knowledge of car mechanics. If you are unfamiliar with the basic components of a modern engine or are unfamiliar with some of the terminology such as crossmember, do more research/ask more questions before tackling an engine swap. Fundamental understanding of electrical basics is good as well. Engine swaps aren't difficult, but its important you understand the basics.
1. Remove original engine and transmission. Start by disconnecting and removing the battery! This is very important! Disconnect whatever goes between the motor/trans and chassis. Unplug and remove the EFI computer and remove the EFI harness. You don't need to take off the fender to do this, removing the inner fender liner will give you access to everything. Remove the radiator so its not in the way. I personally recommend pulling the engine and trans assembly from the top as a unit, and be sure to try and drain the trans (regardless of auto/manual) so all the fluid doesnt come spilling out as the driveshaft comes out. It is easier if the carrier bearing is dropped down, just pull the two 17mm nuts out so it has more flexibility.
2. Clean the engine bay while you can! If your master cylinder has been leaking for years and has removed the paint and rust has started, sand/grind the rust down and repaint it. Eastern/damp climates, watch to make sure the structure of the strut tower isnt too heavily damaged. See http://www.club-s12.org/forums/index.php?a...=40#entry136287 for details.
3. Decide what manual trans you are going to be running. See http://club-s12.org/v3/index.php?topic=29974 for details on the manual trans options.
4. Location of harnesses.
Lower harness/trans harness
So this is where the alternator would connect,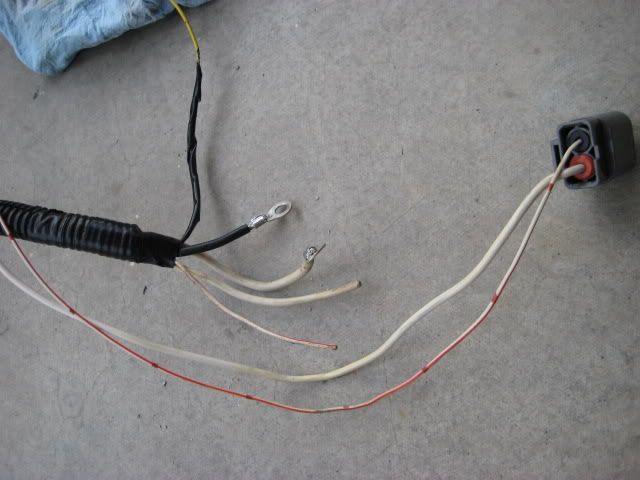
The KA alternator plug is on the right. I already cut off the MK1 S12 'T' shaped connector. MK2 alternators are plug&play, so you skip this portion.
The black wire is just a supplemental ground for the alternator.
The large white wire with the ring terminal is the alternator's output to charge the battery and provide power to the car. If yours is anything corroded or questionable, cut it off and put on a new one.
After you've cut off the 'T' connector and stripped back the wire,
notice the corrosion on the copper. Clean it with sandpaper or something abrasive,
much cleaner and shinier. The solder will flow much easier on this fresh clean copper.
KA plug installed, soldered, and liquid electrical taped. I personally liquid electrical tape all my connections and then insulate them with regular electrical tape, that particular type of tape there is good for 200+ degrees F and will hold up better underhood.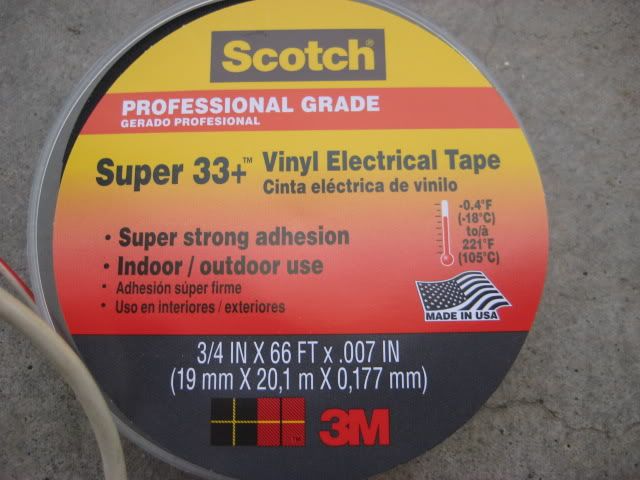
All wrapped up,
The spare wire there with the tape on the end is for the oil pressure sending unit, this harness is missing the connector so I taped it off for now. If yours is missing, a regular female spade terminal soldered on here and connected up to the sending unit will work just fine, I've done it several times with success. Some dielectric grease on the spade terminal if you have some helps seal the connection if necessary.
This is the terminal for the starter, again, if the connection is old/brittled/burned/missing, reinstall a new eylet and solder on, and then bolt up to the starter. If the eyelet has been cut off, you can straight solder the wires together, add a connector, whatever, just make sure the connection is solid and sealed well.
I'd toss some liquid tape on the solder joint too to further seal it from corrosion.
The rest of the connections on the lower harness- the rectangular plug (neutral safety switch) and the oval plug (reverse lights), you can see them above- should snap right in about where they lay out if you run the harness back there. The automatic trans harness is simply the manual trans harness with a different connector for neutral safety/reverse switches (they are all in one in the range switch) and an ADDITIONAL harness wrapped in. If you unloom the auto trans lower harness and separate out the wiring that is auto-trans only (it will be obvious) and cut/splice or add connectors to replace the single 4 pin connector to go to two separate plugs (that is what the manual trans has) you'll be set. 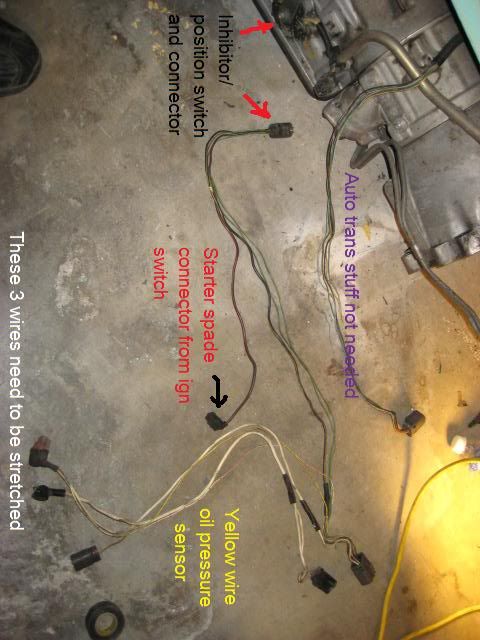
^not stretched (from another thread) connector changed if needed
Here is a pic that shows where the lower harness connects, the rectangular black 2 pin connector is alternator power feed (those are the two wires pictured above), one of the larger 8 pin or so connector is for the rest of the lower harness (trans connectors, starter, other alternator, oil pressure sending unit etc), and the other 6 or so pin connector in the middle there is for the auto trans wiring if you have it, which can just remain unplugged as it is in manual trans cars.
again, if you have an S12 that originally had a manual trans, its a plug&play for the transmission connectors.
(insert pic of S13/14 engine harness layout)
(insert pic of S12 engine harness layout)
(pic of jumper)
When I lengthen the wires, even if they are just getting capped off, I stagger the connections so you don't have a big lump where all the wires are joining. This also lessens the chance of wires shorting to each other. All wires get the liquid electrical tape plus regular electrical tape (liquid is just for sealing really) then a final comprehensive wrap.
This was an S14 KA swap with an engine bay wiring tuck, hence the bundle on the outside of the bay.
(add in the rest here)
5. Motor/trans mounts: use KA mounts. Take off old mounts and install KA mounts using preferably a stubby 14mm wrench. depending on your wrenches, a regular one might work, it depends on the length. If you've got enough room, a flex head ratchet with a medium to shallow depth socket may work as well.

6. Exhaust connections.
Exhaust manifold must be lengthened at the primary tubes or floor bent upward for clearance. From the factory, S13 KA's are 4-2-1 style exhaust manifold, meaning the four runners condense into two runners (this occurs in the cast iron exhaust manifold) and then the two runners merge further downstream in the tubular downpipe into one tube. I personally have lengthened the two secondary tubes about 1 1/4" allowing the exhaust to clear under the car with mild hammering (about 1/2" upward for clearance) but then the pipes are not sticking below the frame rails. S14 is 4-1, all 4 exhaust ports merge into one large collector in the exhaust manifold, in this instance you would be lengthening the single large downpipe.
(pic of lengthened sohc 2pc stock downpipe)
Installing an s13 header/downpipe is possible, but the floor of the car needs to be hammered up a good 2" for additional clearance. This is pics of an NA header installed on a KA-de showing the extent of floor mods to get the header to clear.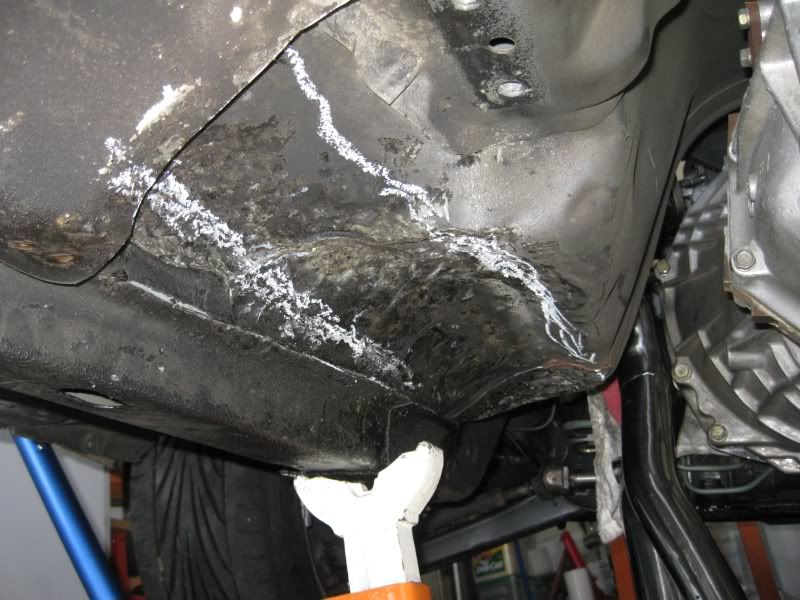
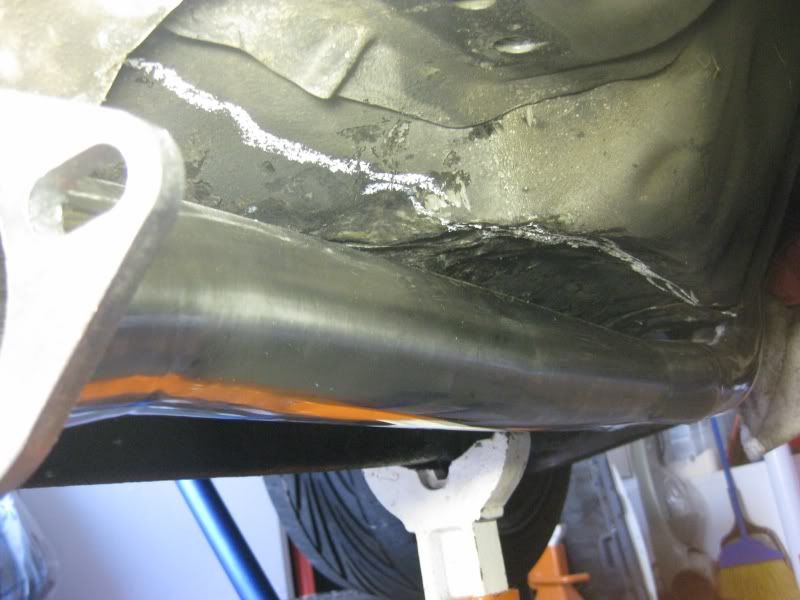
Some other things you'll need for the swap:
KA motor mounts
KA engine wiring harness and ECU
KA plastic intake tube, coil, and MAF (anything that is attached to the KA's EFI harness, really)
Extra new wires to run a jumper harness between the KA's EFI harness and the S12's chassis harness, as the points of connection/splice are on the opposite sides of the engine bay.
KA or oval style alternator plug (MK1 only)
S12 CA20/CA18 lower harness (its attached to the trans and alternator, just leave it in the chassis)
Oil, filter, coolant, and GL-4 gear oil for trans
If they've not been replaced recently: Ignition cap/rotor/plugs/wires, hoses and belts, including heater hose connections. I would also replace all the vacuum lines on the KA before it goes in, much easier while the engine is out.
Other tidbits:
Remove the speedometer drive gear from the original S12 trans if you are using an S13 trans, as you'll be removing the S13/14's digital sending unit and installing the cable drive.
Install engine and transmission together, use two people preferably. Leave center carrier bearing loose and use a jack to help align the trans upward into the tunnel to engage driveshaft.
Power steering pressure line needs to be bent to allow for connection to KA pump. Low pressure feed line from reservoir to pump needs to be replaced, shape is different.
Heater hose connections: (one CA20 line can be reused possibly)
(lots of other info yet to come here)
PM me with suggestions if you'd like!
Apr 8, 2010, 1:39 am · #1