Browse › Builds & Media ›Build projects

85 hatch in New Zealand

Started by Juddez · Dec 28, 2011 · 30postsSMF 2010–26

JuddezDec 28, 2011, 1:29 am · #1

Hey guys.
Thought I should start a build thread now that I am replacing the engine.

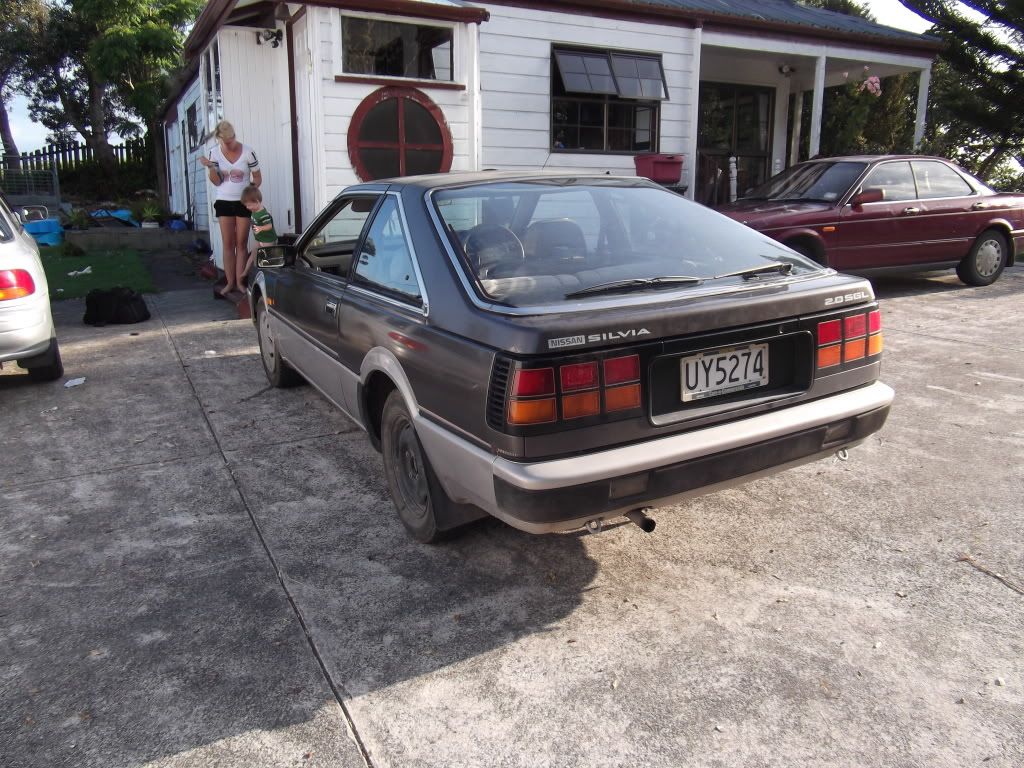
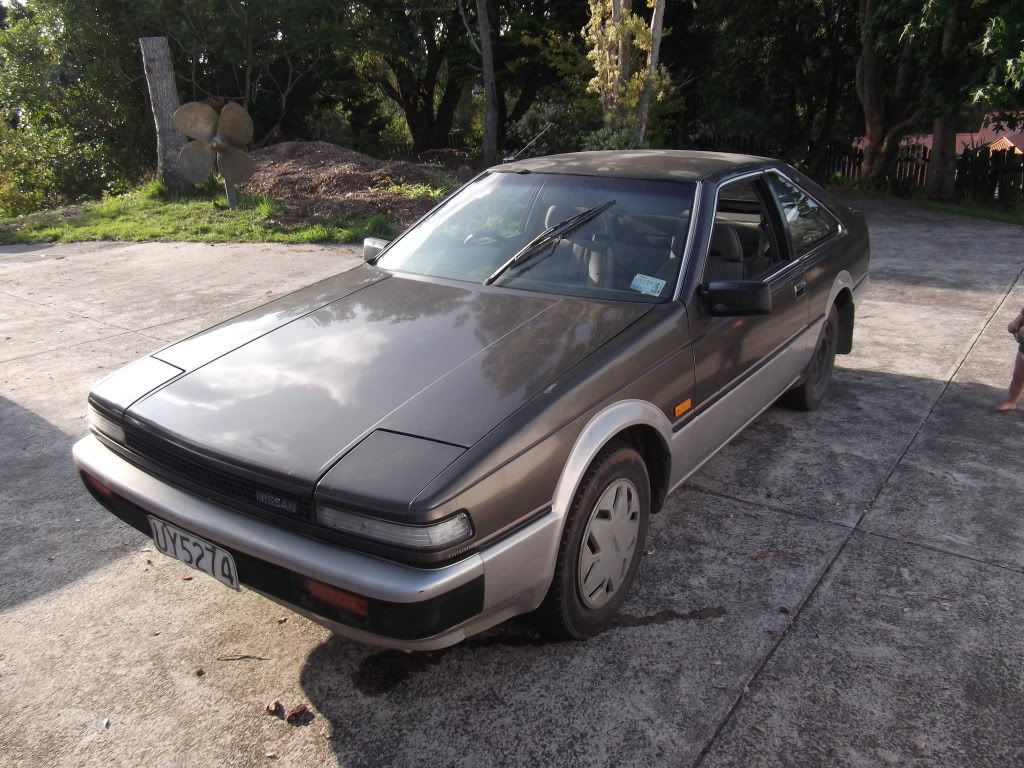
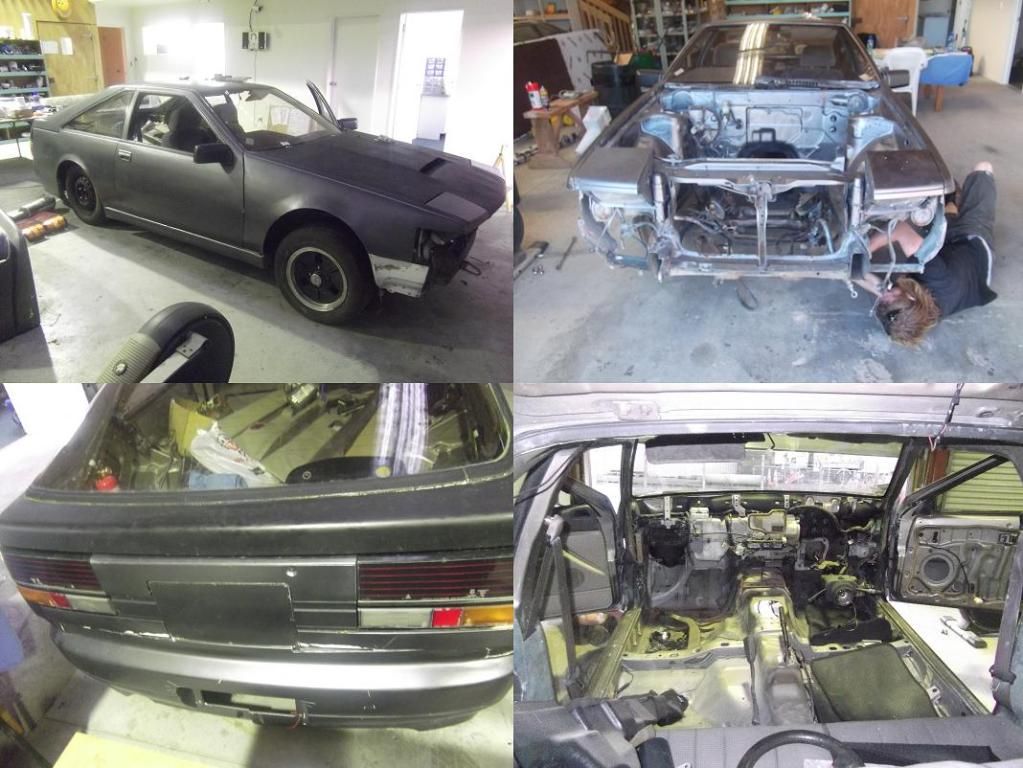
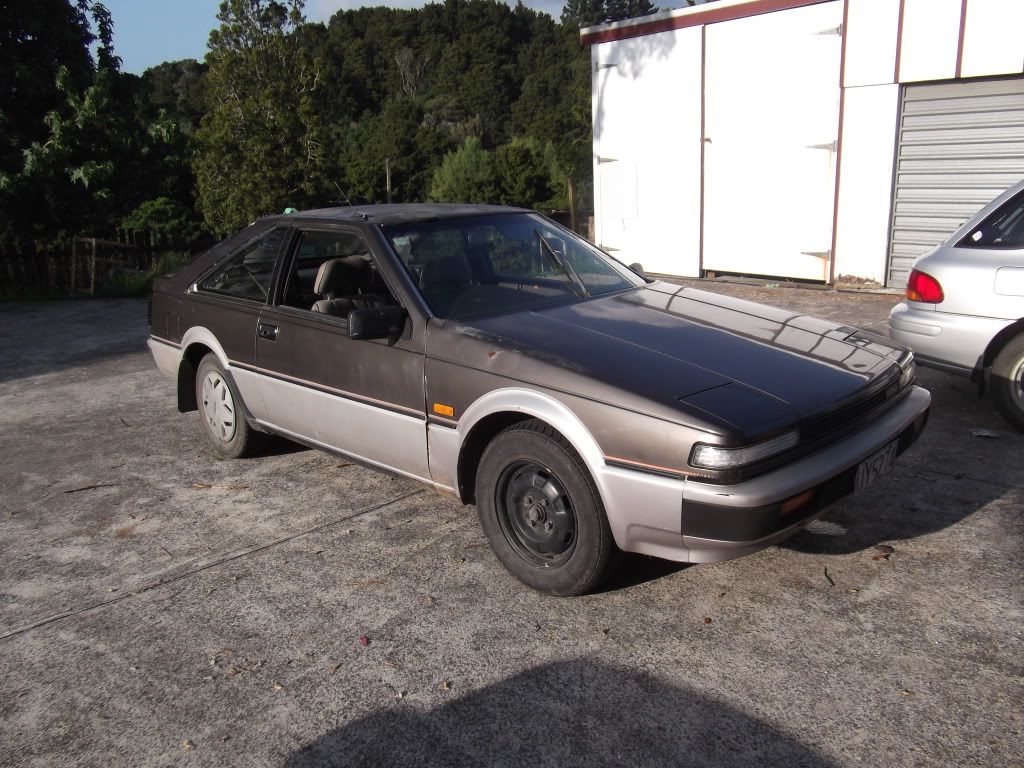
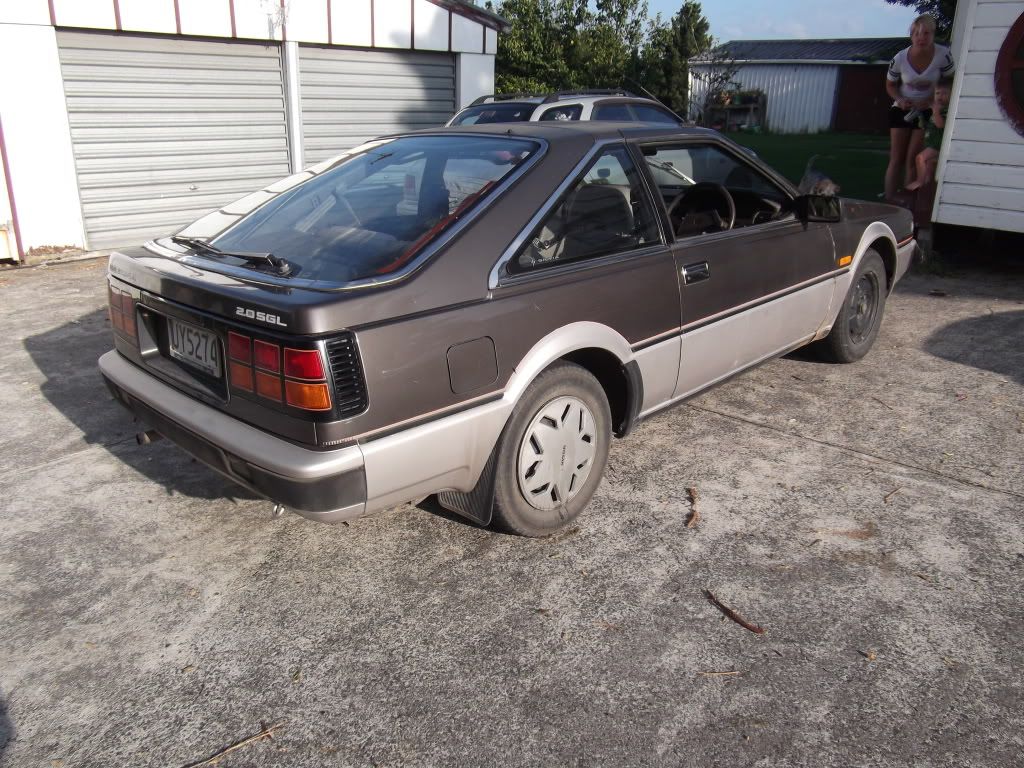
Got this 85 Hatch SGL2.0 in Jan 2011
posted image
posted image
posted image
posted image

As you can see it is missing hubcaps, only had one window wiper and had a bit of rust in it. Now keep in mind that the S12 is a VERY rare car in NZ so this was actually fair condition for what I paid for it


Post Merge: 01:31:55 AM / 28-Dec-11

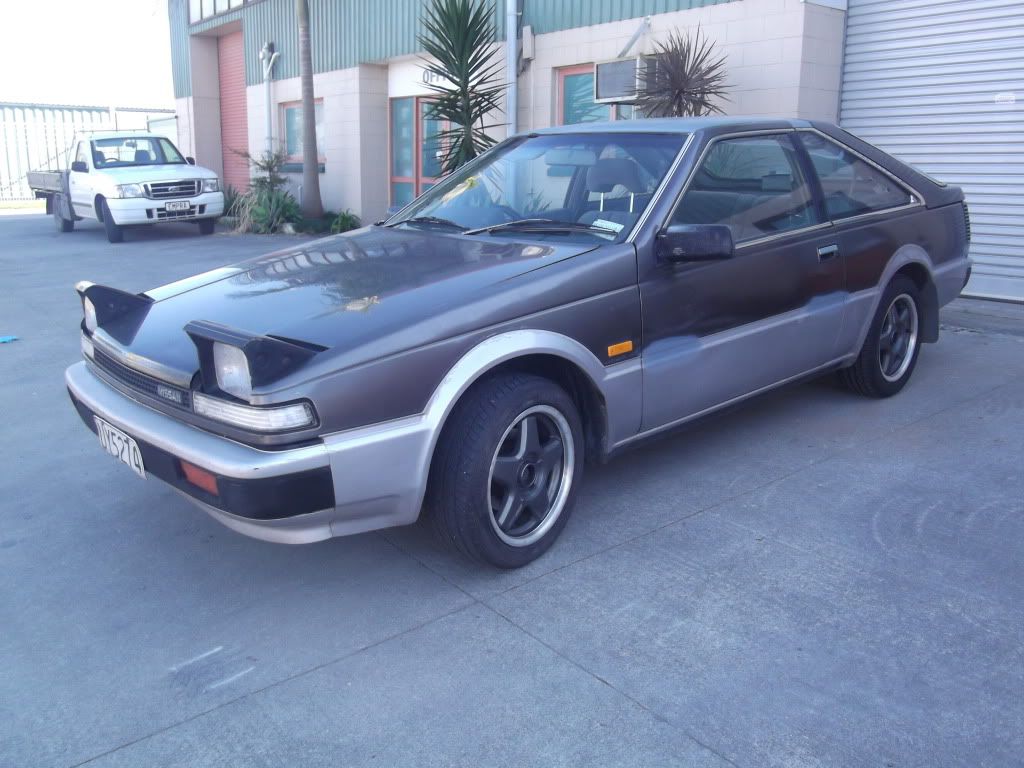
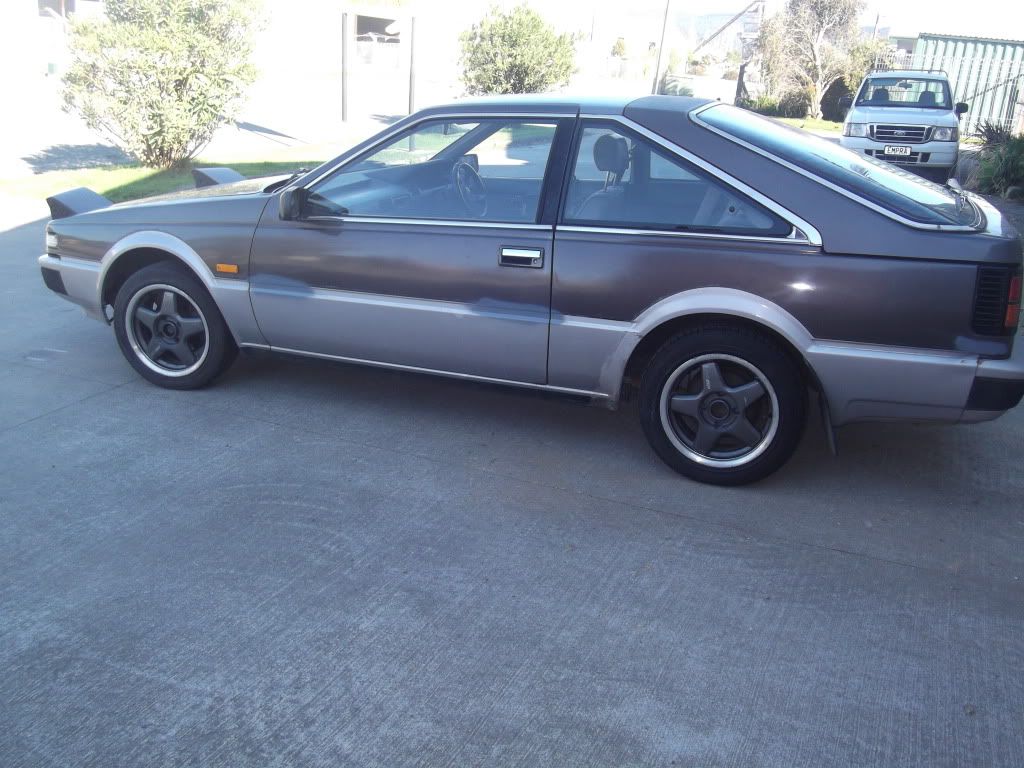
I put a set of rims on a few months ago, just some 15x7's to use until i have the body work finished and can put some work equip 01's on (hopefully)
Also did a little panel and paint work
posted image
posted image

Post Merge: 01:40:04 AM / 28-Dec-11

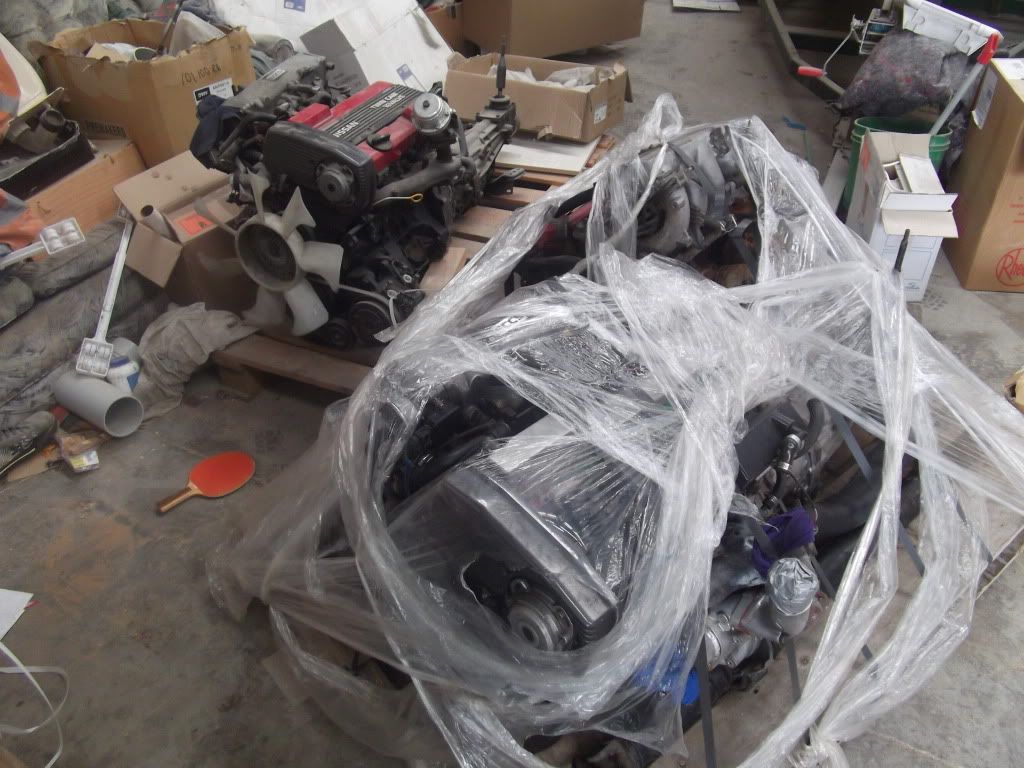
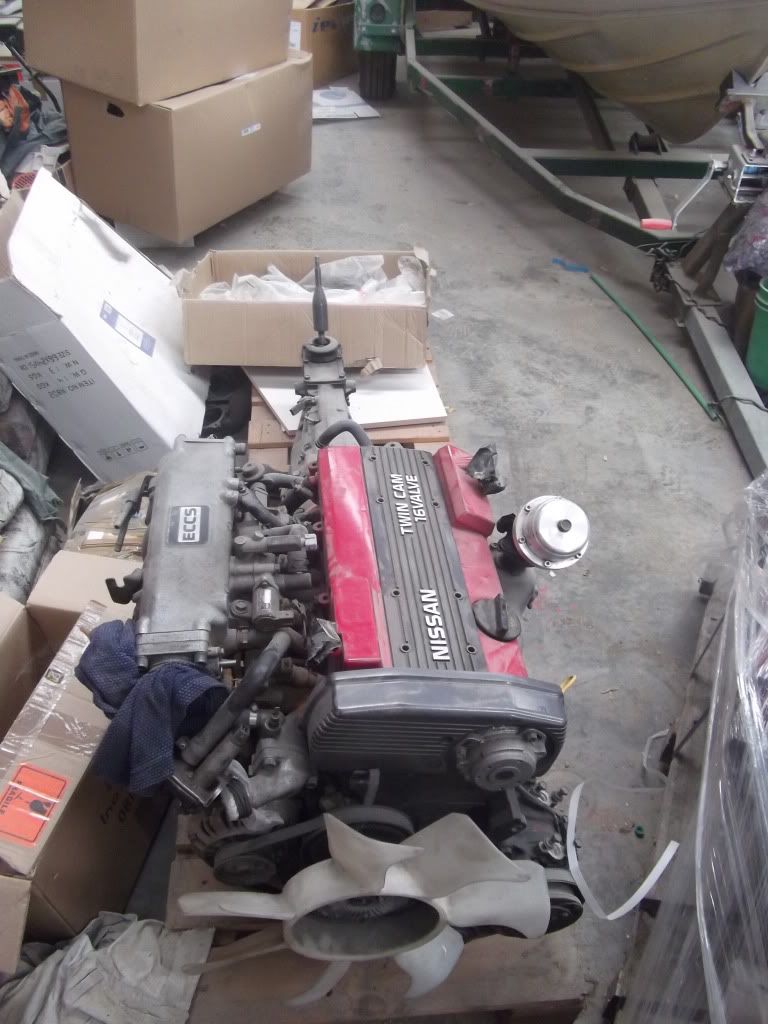
A couple of weeks ago I received a delivery of :
2 x CA18DET's (one with an upgraded turbo (t28) and a 38mm external wastegate)
2 x 5 speed manual gearboxes
1 x CA18DE
1 x 4 speed auto box
2 x S13 looms
2 x S13 ECU
1 x S13 drive shaft
2 x t25 turbos
And a bunch of other stuff all for about $1600NZD
posted image
posted image

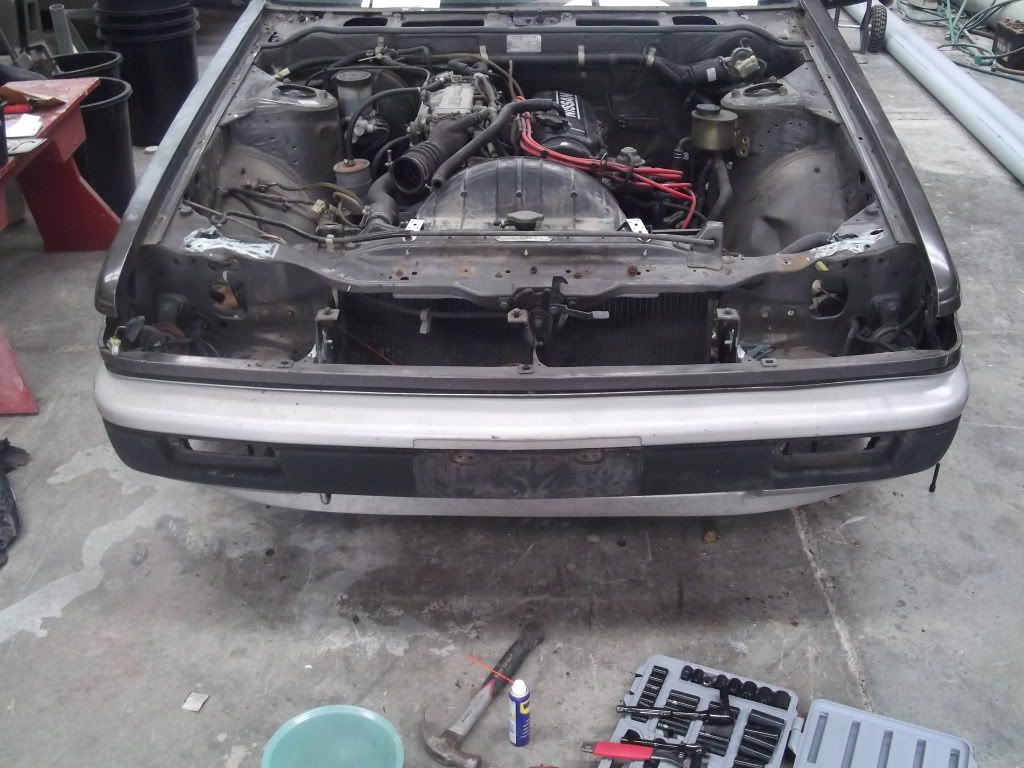
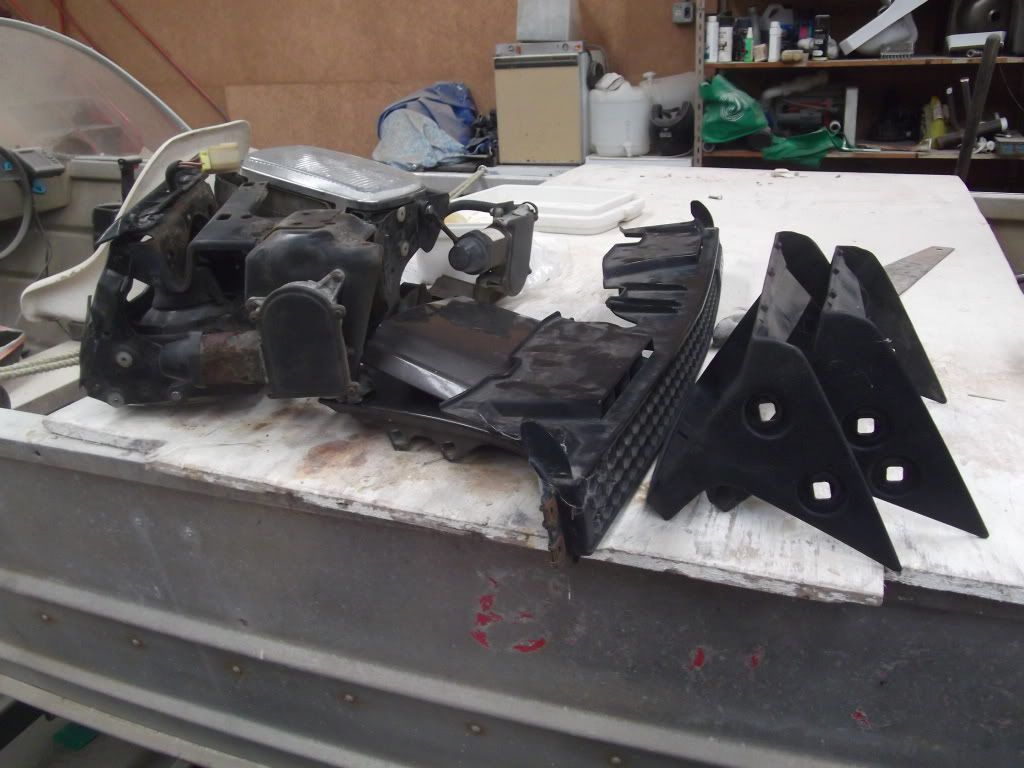
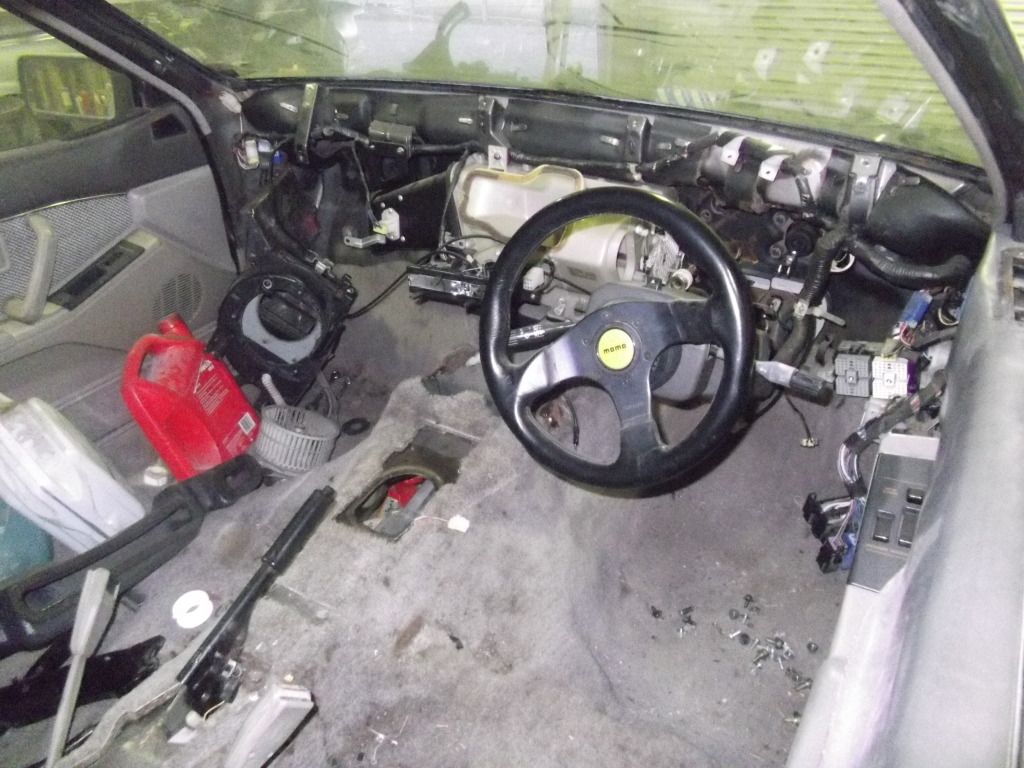
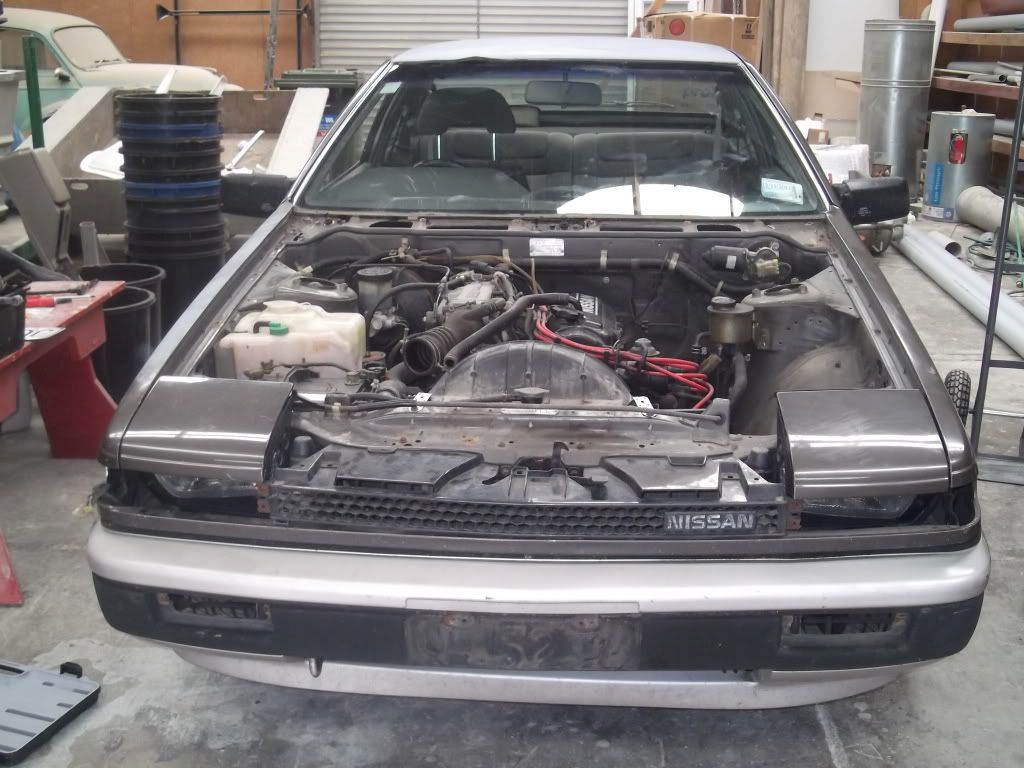
And today I started pulling the CA20E out getting ready for the swap
posted image
posted image
posted image

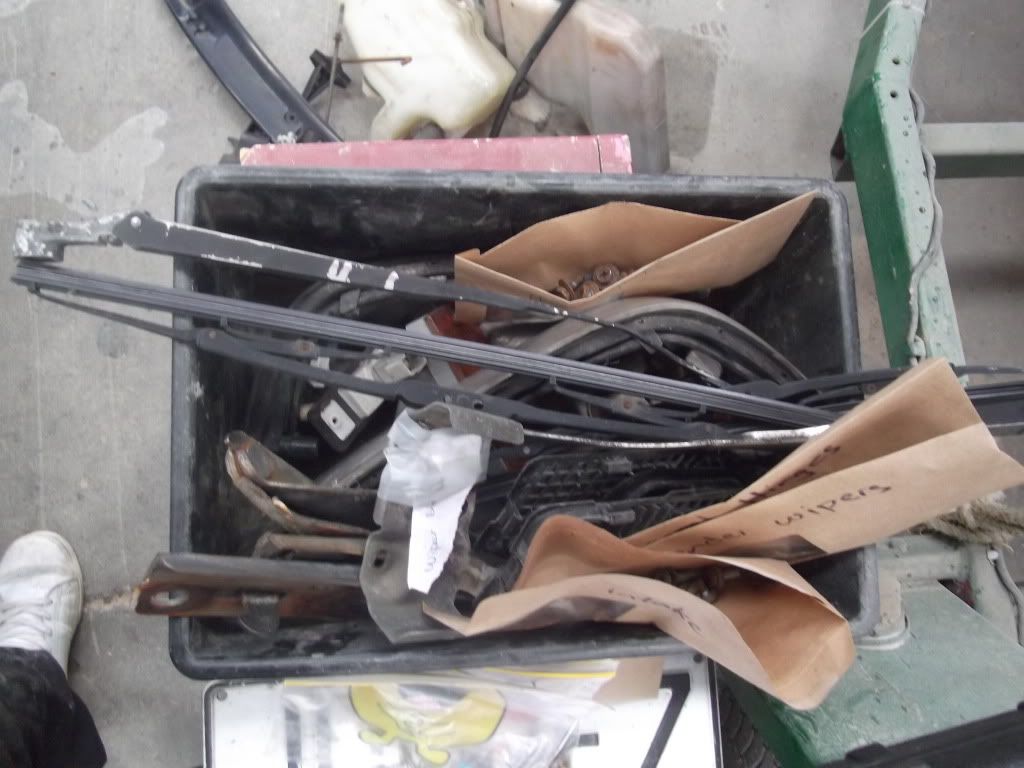
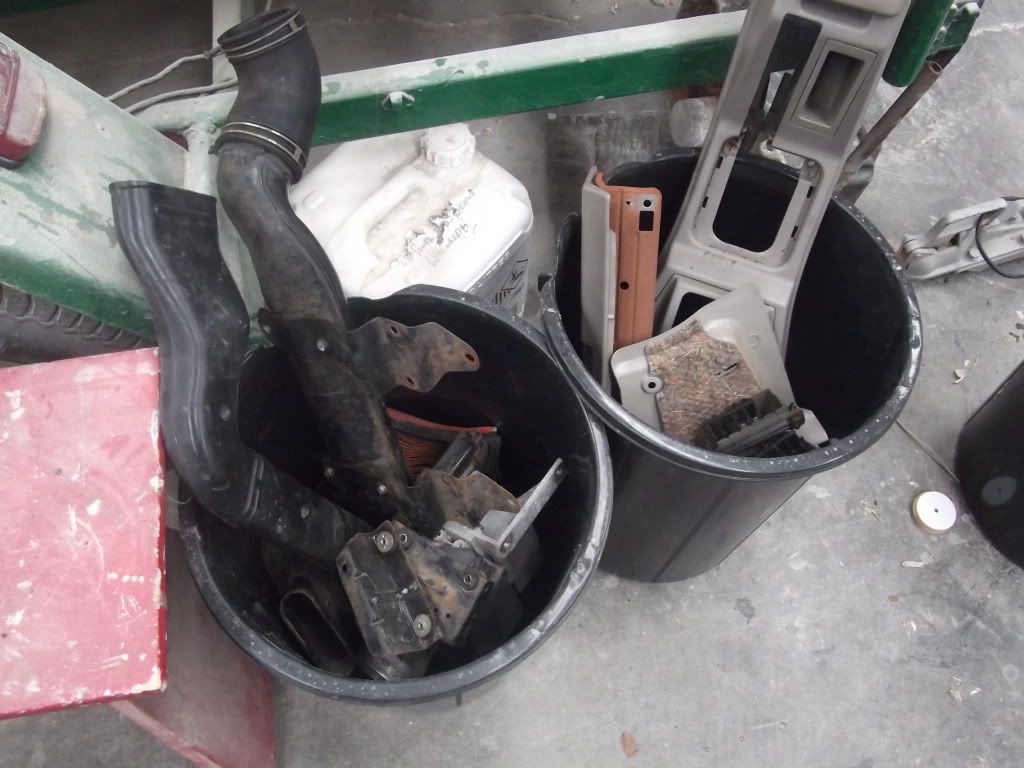
And here is all the buckets and containers of bits I have taken off so fat (note all the screws, nuts and bolts are in envelopes all labelled so I know where they came from )
posted image
posted image
posted image

I'll put up some more tomorrow once the engine is out

What does everyone think ??

Post Merge: 11:17:43 PM / 28-Dec-11

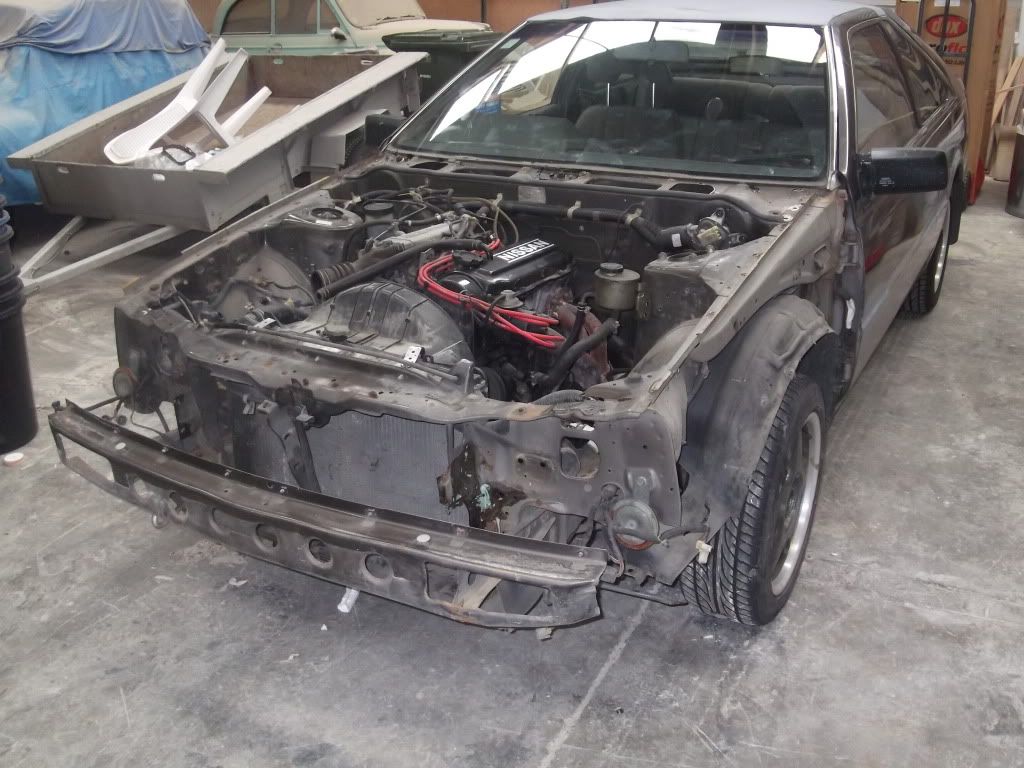
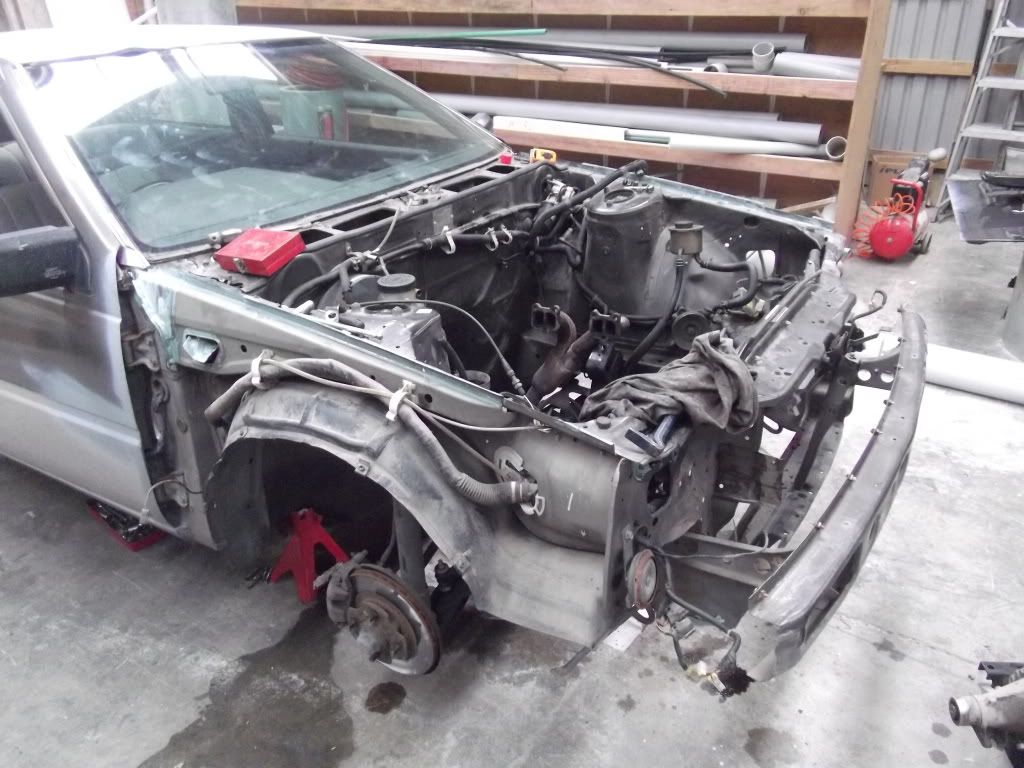
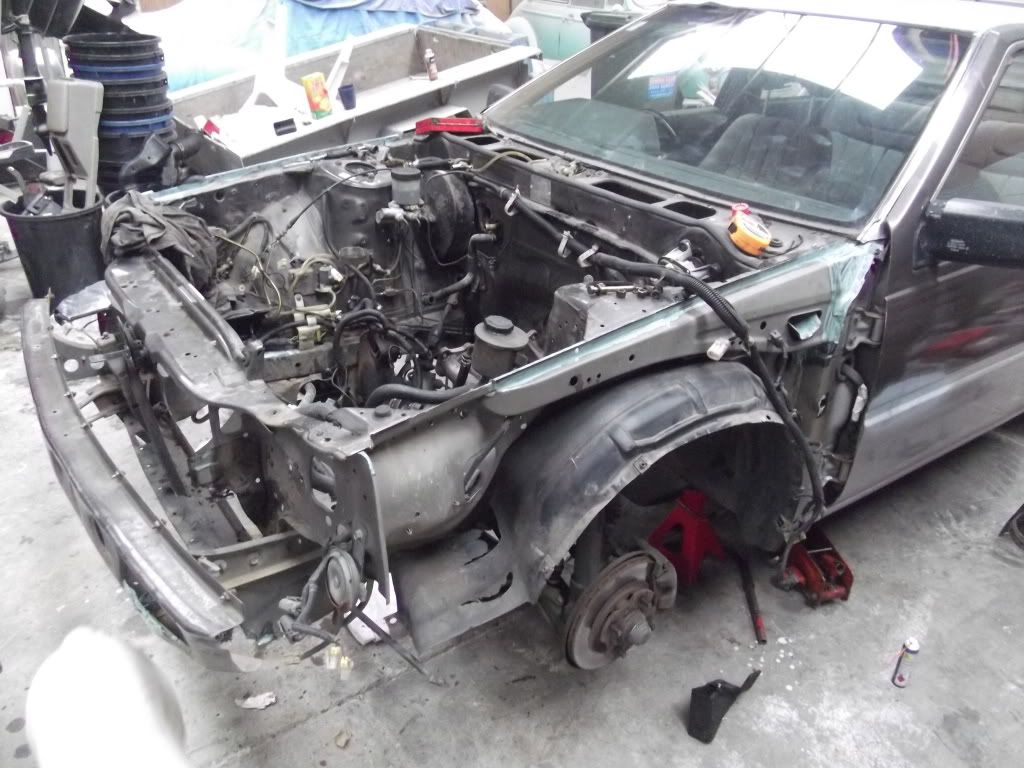
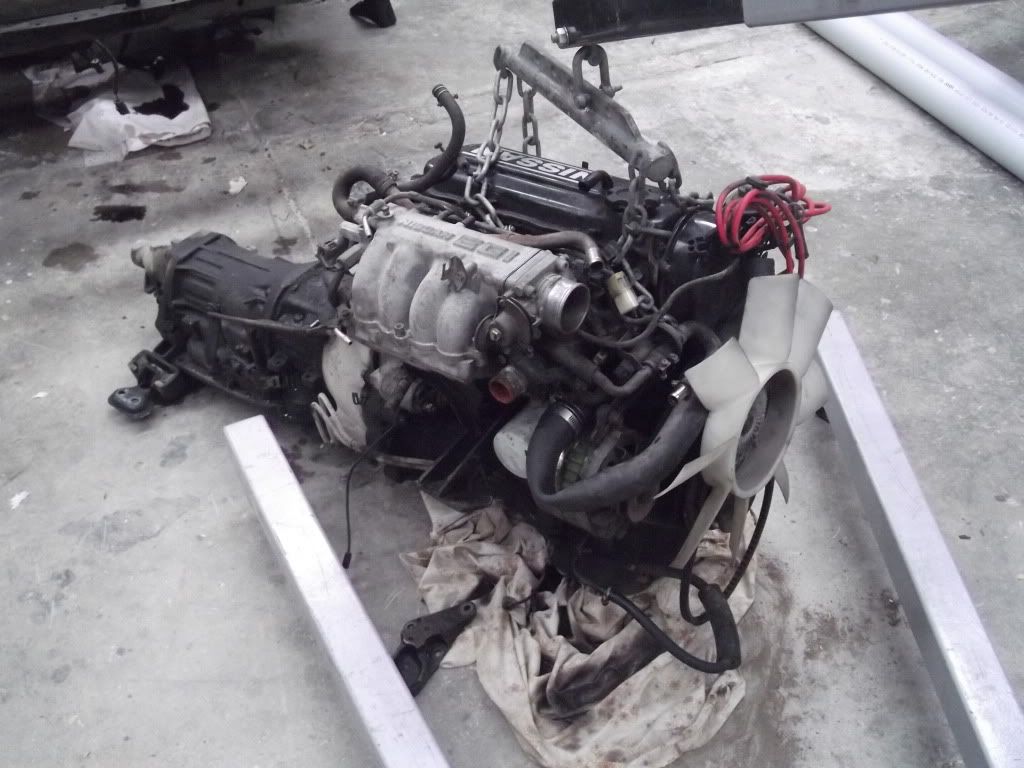
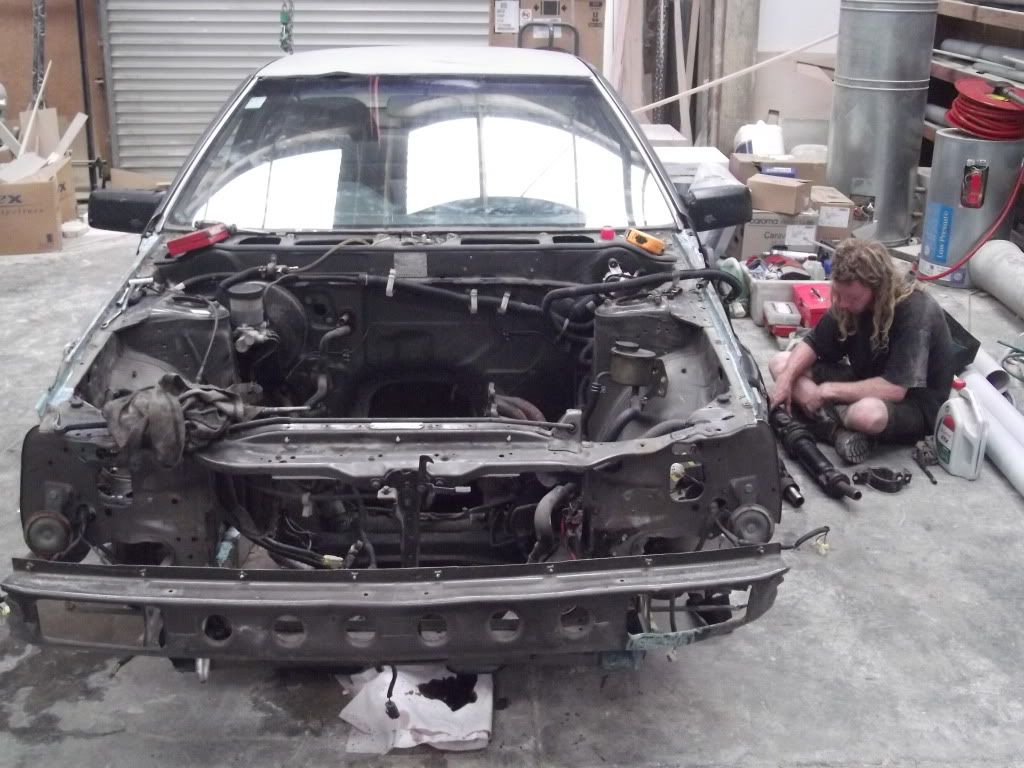
Got the engine out today.
Gonna prep the engine bay after new years and then put the CA18DET in.
posted image
posted image
posted image
posted image

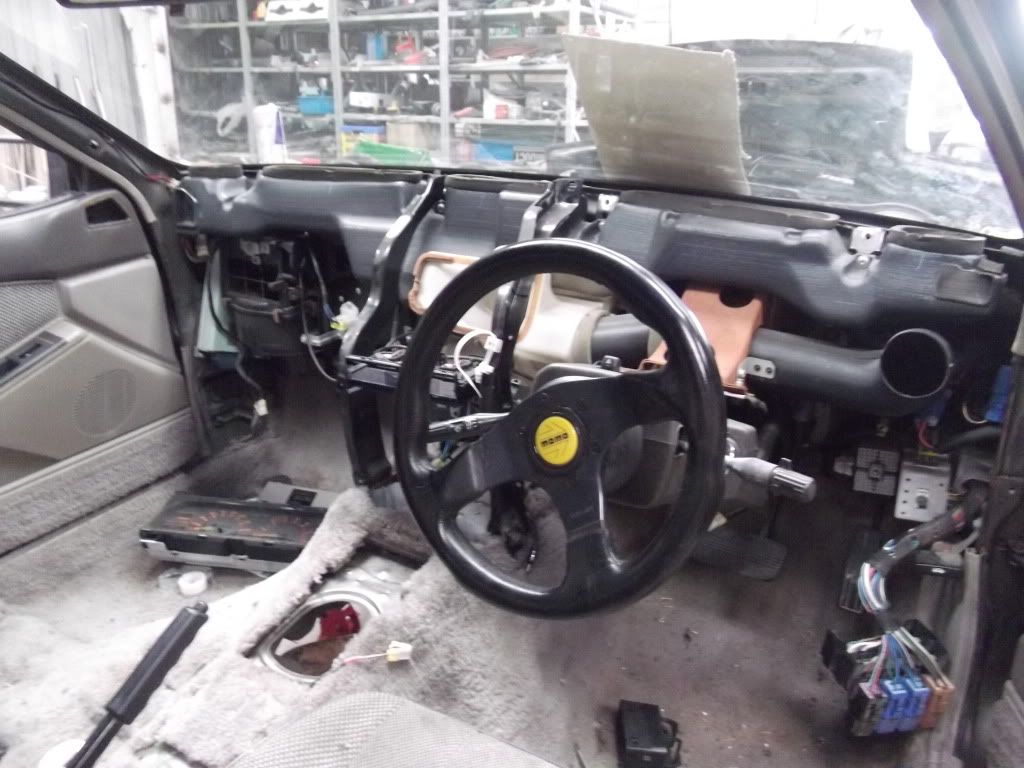
And it was at this point that I started thinking "What the fuck have I gotten myself into?"
posted image
ProlowtoneDec 29, 2011, 8:35 am · #2

Good luck!

JuddezDec 30, 2011, 1:03 am · #3
Prolowtone on 08:35:25 AM / 29-Dec-11
Good luck!
Thanks !! I'll need it haha
Jeremy ADec 30, 2011, 1:09 am · #4

Killer two-tone!  Which engine is going IN the car?  Lots of awesome builds lately!  Your's is one of em.

JuddezDec 30, 2011, 1:19 am · #5

Had a CA20E (auto) in it. Building the best CA18DET (manual) I can out of the 2 engines I have sitting there. Engine should be going in some time in the next 2 weeks. I am going to be waiting on a clutch/brake pedal box from Australia as I cannot get one in New Zealand  :reallysad:

Thanks by the way

RedneckDec 30, 2011, 1:59 am · #6

Considering the lack of camber in the pics and what looks to be rear drum brakes it appears that you got the solid rear axle. If thats the case I am guessing you have a late 84 model that was sold as an early 85 model.

JuddezDec 30, 2011, 2:12 am · #7
Redneck on 01:59:30 AM / 30-Dec-11
Considering the lack of camber in the pics and what looks to be rear drum brakes it appears that you got the solid rear axle. If thats the case I am guessing you have a late 84 model that was sold as an early 85 model.

Yea it is SRA. First sold in NZ in March of 85
RedneckDec 30, 2011, 2:39 am · #8
Juddez on 02:12:01 AM / 30-Dec-11
Yea it is SRA. First sold in NZ in March of 85

Pretty cool you got a SRA model too. Here in the states the SRA's tend to be the most desirable (and rare) s12 variant after the SE's.
JuddezDec 30, 2011, 2:46 am · #9

Really ? For what reason ? I would much rather have IRS (coilovers  :yes:)

ProlowtoneDec 30, 2011, 3:06 am · #10

Drop the car and you wont have mad camber like the rest of us if we were to attempt it

RedneckDec 30, 2011, 3:09 am · #11
Prolowtone on 03:06:02 AM / 30-Dec-11
Drop the car and you wont have mad camber like the rest of us if we were to attempt it

This ^^

When you dump the IRS the rear camber gets pretty bad due to the archaic non adjustable semi trailing rear arm suspension. Even relatively modest drops of 1-1/2 to 2 inches and your rear camber is likely gonna be in the -4 degree range at the minimum.
JuddezDec 30, 2011, 3:12 am · #12

Speaking of dropping it..... Can you guys recommend some springs that are going to get me the lowest possible drop without having to do all the mods to put coilovers in an SRA ?


Post Merge: 04:18:22 PM / 30-Dec-11

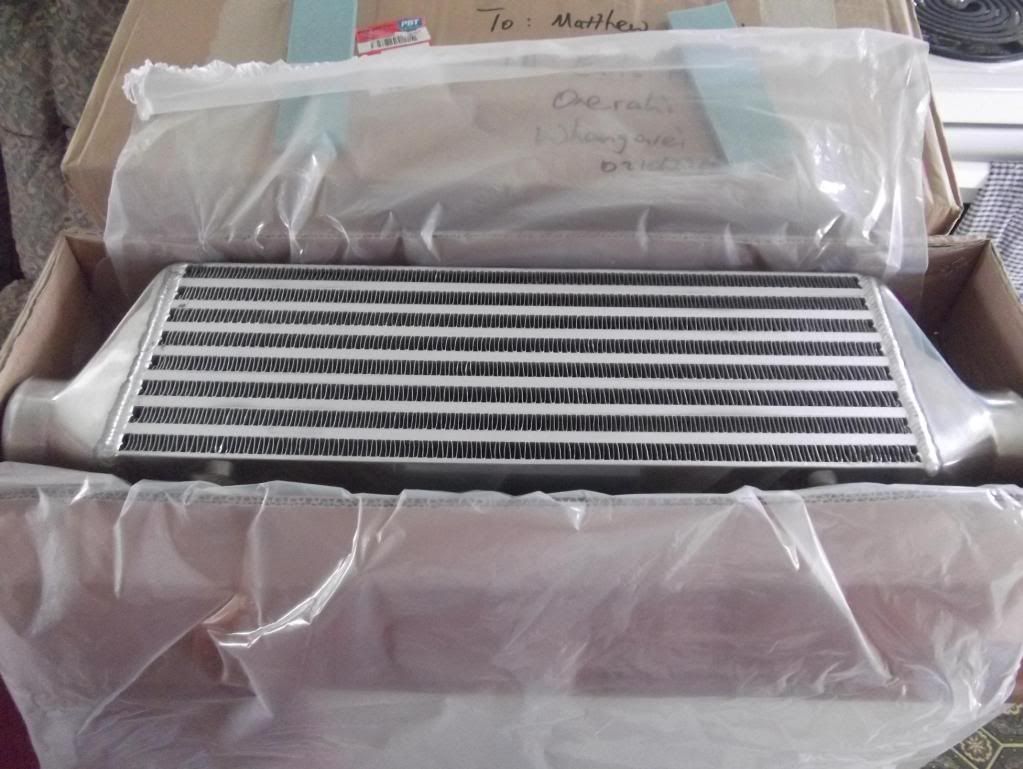
New front mount arrived today

Core measures :
450mm wide
150mm high
75mm thick

posted image
JuddezMar 22, 2012, 3:18 am · #13

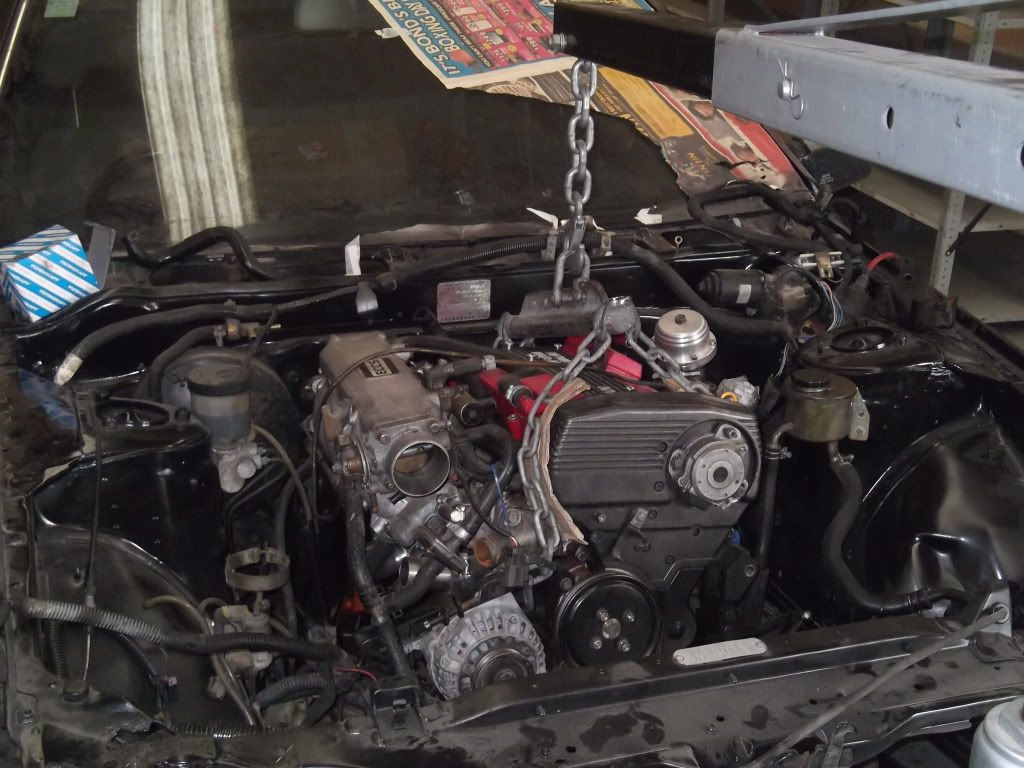
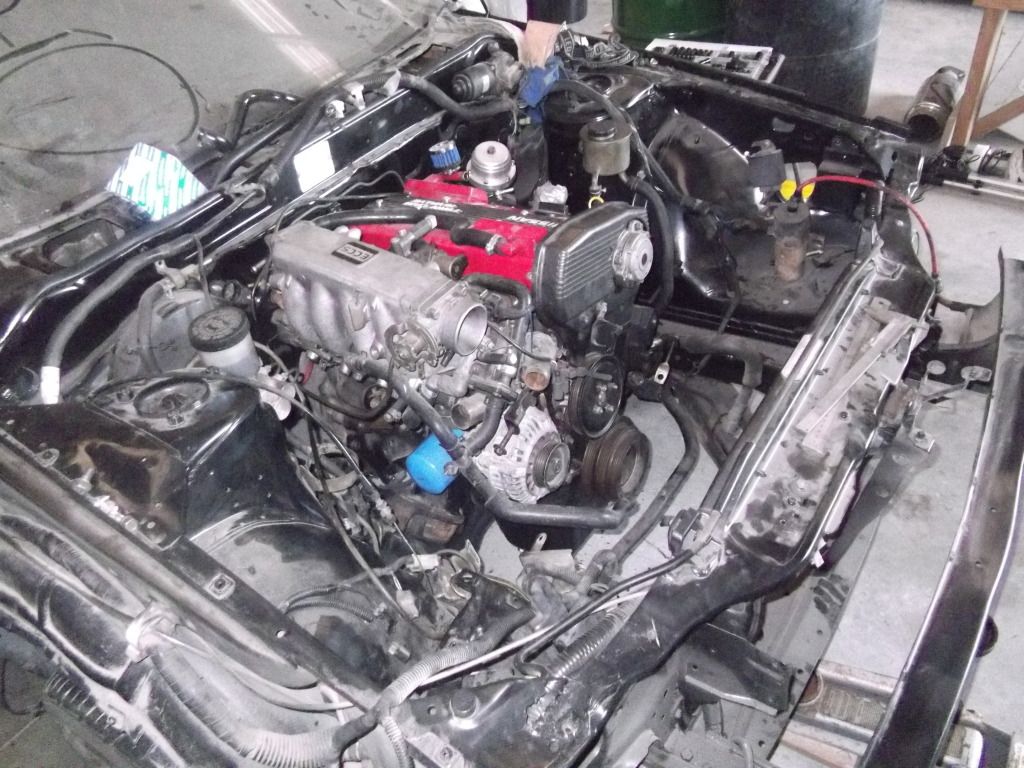
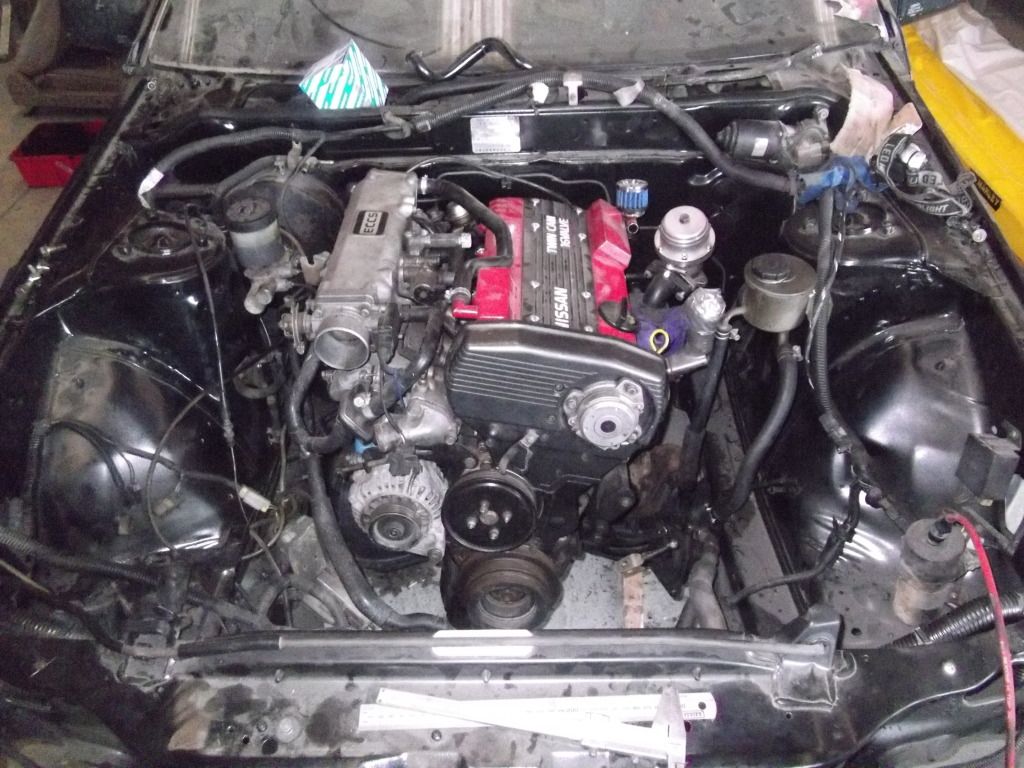
Well its been awhile since I updated this. After finally getting all the little bits and piece together to build a complete, good quality, CA18DET out of the ones I had we attempted a fit today.
At first things went well, went in nice and easy, I might get away with the extra length of the manual gearbox without having to cut any of the tunnel out (should have about 2mm clearance, its extremely minimal but better than cutting anything).
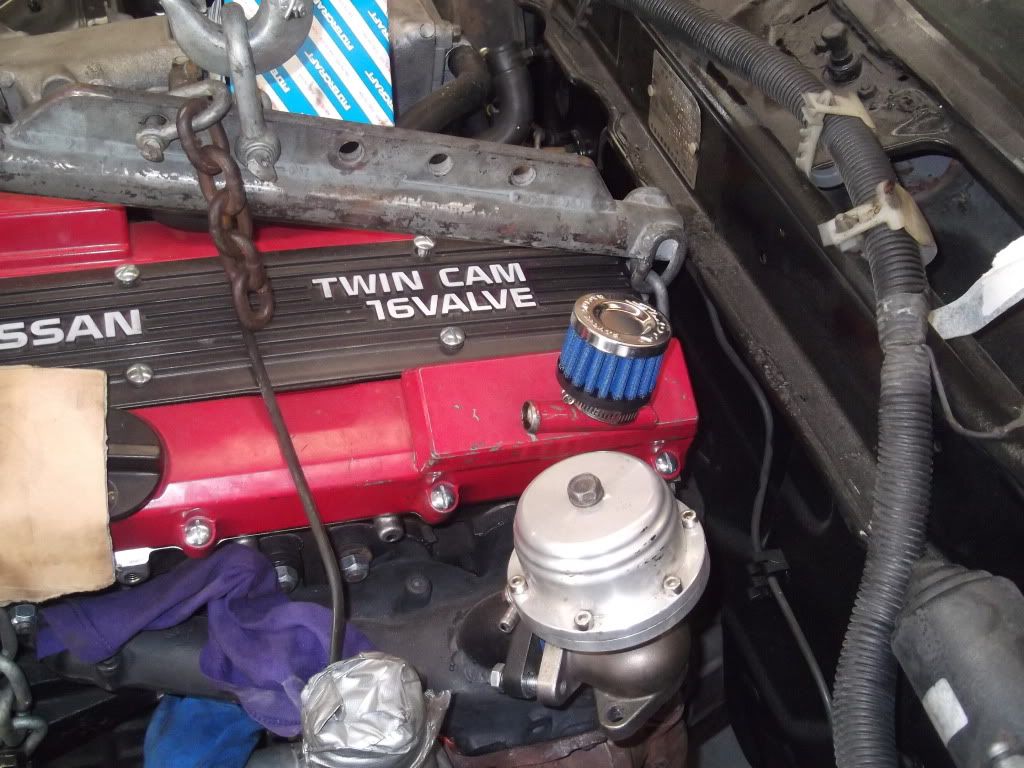
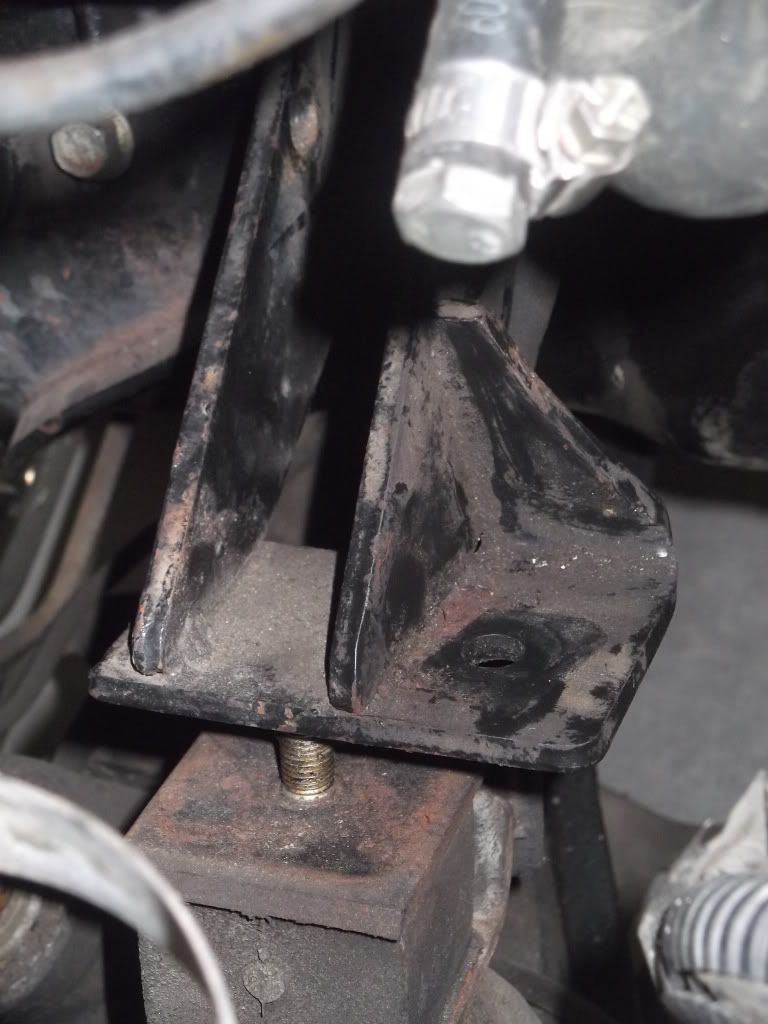
The problem arose when we discovered the factory CA20E engine mounts (that bolt into the CA18DET) do not line up with the mounting points now they are on the new engine. Another smaller problem is the factory mounts do not allow me to put the oil filter in because of their shape.
So for now it is still sitting on the hoist and I have to get an engineer mate of mine to modify the mounts.
I will post photos of the problems I am facing tomorrow and then once its all sorted I will put up after photos.

Its been a long process but I feel we are finally getting somewhere

ArroMar 24, 2012, 10:12 pm · #14

Pics?

JuddezMar 26, 2012, 2:43 am · #15

First off, here a couple of pics of the engine sitting in the bay. The final one is the engine mount. You can see by one of the earlier pictures that the engine is already sitting VERY close to to the firewall so cant go back any further. I can modify the mount easy enough but was sure I had read in some of the threads that it should bolt pretty much straight in.

posted image
posted image
posted image
posted image

Any help or ideas guys ?

Just as a P.S. I love the way the DET looks in the engine bay. Cant wait until the thing is running  :laugh:


Post Merge: 02:53:14 AM / 26-Mar-12

Oh, and by the way, The engine bay is getting a nice tidy up once the engine is in and the wiring is done. I promise it will look better than it does at the moment
zips1Jun 11, 2012, 5:57 am · #16

hey man nice build thread what part of nz are you in ? i picked up my s12 about 2 months ago ive done a bit to it might have to join you on a build thread keep it up be good to see another one in nz

spiderwebfxJun 13, 2012, 1:02 am · #17

zips1, join the S12 Silvia on NZ and Aus facebook page found here
Matt and I, as well as a few others from NZ are there and can help you out if you have any questions or whatever.

Also, Matt have you had anymore progress on your engine mounts?

-Chris

JuddezJun 18, 2012, 5:15 am · #18

Woops, sorry guys.
Havnt been on the site in ages and didnt realise I had posts on my build thread.
zips1, I am in Whangarei, Northland.
As Chris said, join the facebook page and catch up with some of the NZ owners. Unless you already have, in which case I have already approved your request.
Chris, waiting on engine hoist so I can check. I have had to customise the stock ca20 ones so we will see once I have the hoist.
Also, once that is done I will be updating the thread

JuddezJul 14, 2012, 10:20 pm · #19

RIGHT !!!

After a bit of research and a lot of help from you guys on the facebook page, I have made some progress.
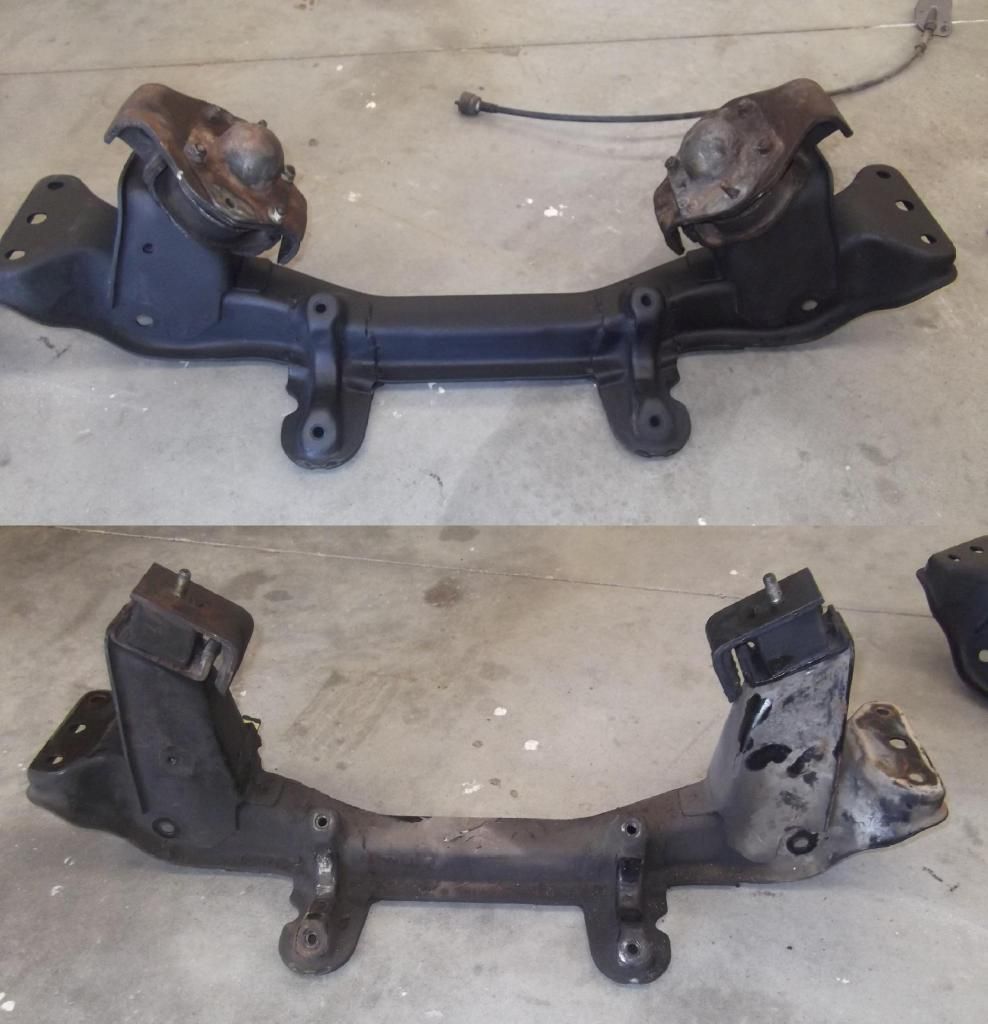
Turns out the reason my CA18DET would not bolt on to the x-member is that the NZ assembled, CA20E powered s12's had a Bluebird/FJ20 x-member in them. As opposed to the one the USDM and JDM ones came with.
posted image
(import one at the top, all painted and ready to go in)

I tracked down and purchased a parts car -
posted image
It was in a bad state when I got it.
Only purchased for the x-member, tail lights and spares.

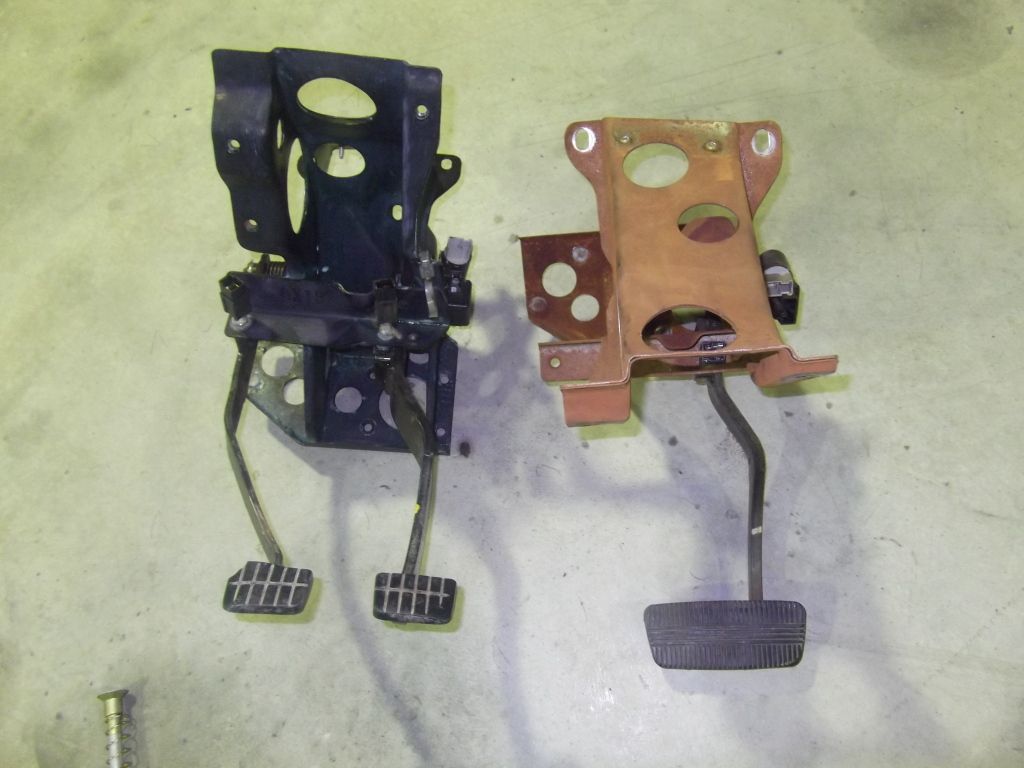
After a Saturday and a half a Sunday (with a MASSIVE hangover) of hard work, we had the x-member was swapped, the pedal boxes pulled and the manual one installed in the project and finally the engine dropped in and bolted.
posted image
posted image
posted image
posted image

Now im waiting on my new Aluminium radiator, silicon radiator hoses, custom overflow bottle and oil catch can to arrive.
Once all of that is here, I will assemble it together, put all the fluids in and then have it wired.
Got a mate of mine to sus out a professional to do the wiring for me so he is just waiting for me to get my shit sorted haha.

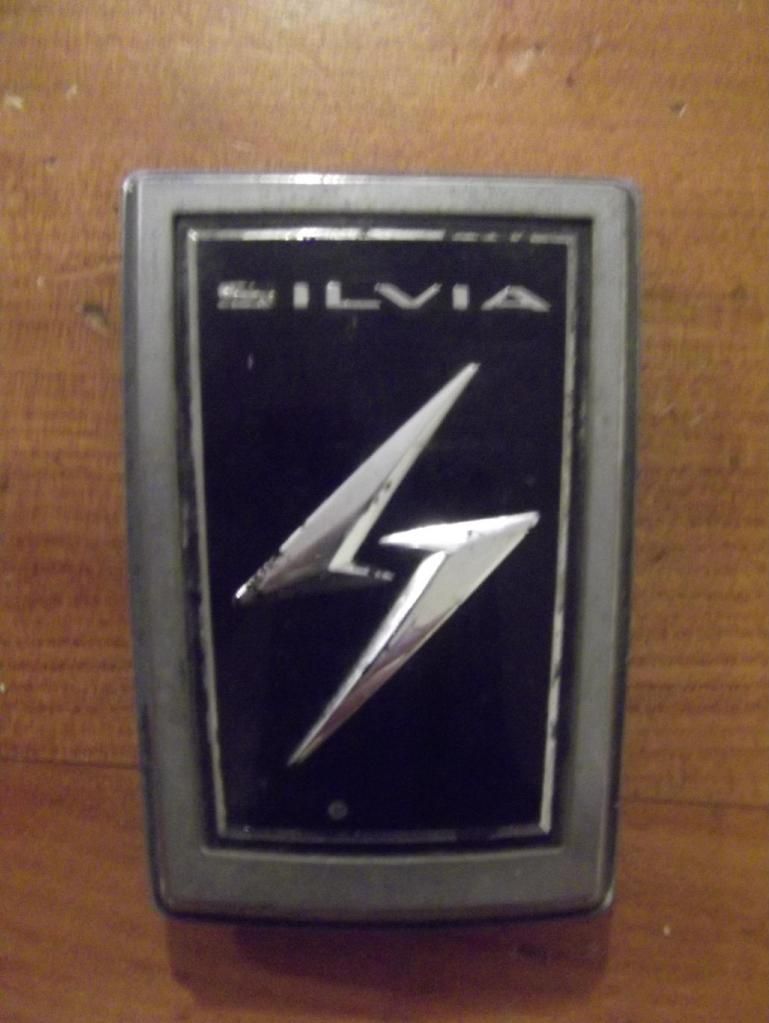
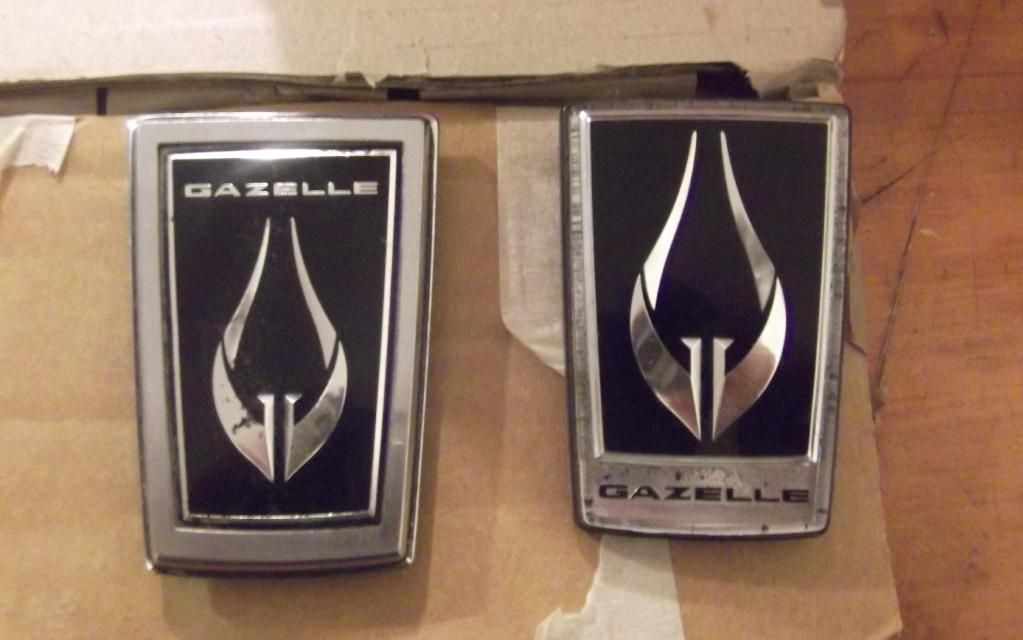
Oh, and am I am sure some of you saw on the facebook page, I received these the other day (and have another 3 silvia ones heading my way)

posted image
posted image

So thats where I am at at the moment. I will be sure to upload some pics once everything is in place and the wiring is done.
Also a video of starting her up  :yay!:

caps86Jul 15, 2012, 1:22 am · #20

where did you get that scooped hood from? I want.

RallymodellerJul 15, 2012, 1:36 am · #21

Ain't nothing like a stripped-out car. It's like a blank canvas, waiting for paint. Beautiful.

JuddezJul 15, 2012, 1:37 am · #22

Haha. No you dont. It came on the parts car when I got it. Its a piece of shit. Some muppet has tried to make a fibreglass bonnet but it weighs the same as the steel one, its rough as fuck. Looks alright in the pictures but there is holes and dips and rises all through it. I have already binned it


Post Merge: 01:39:01 AM / 15-Jul-12

Thats the parts car that is completely stripped. The carpet and back seats are staying in the project car
zips1Jul 15, 2012, 5:21 am · #23

wow where did you get the gazelle badges from ?? iv been serching but no luck ? ... isnt geting the pedal box out a efhewgufieri ? i have just done mine as some one stole my s12 last week and crashed it and i have since picked up an auto one to switch the parts over well the good parts any way

ArroJul 15, 2012, 4:13 pm · #24

Looks like he made it by cutting a tab in the hood and bending it a bit downward. I've seen it done before on our cars and on other cars, and if you do it right it can turn out nicely.

JuddezJul 16, 2012, 1:22 am · #25

Hey Zips1,  Got them off trademe. Cant even remember how I came across them ( I was drunk trademeing at the time haha ). Jason - That is kind of what he has done. Left the steel frame there, made a whole fibreglass hood, added a rise in the middle and then as you say, turned a bit down. If it had of been someone who know what they were doing it would have come out alright. As it is, it looks like an abortion gone wrong.....

ArroJul 16, 2012, 1:42 am · #26

Hey can you do me a fav and take close-up pictures of your door where the edges are, specifically where the twotone colors meet and the rubstrip ends? Also, of the wheel arches if you could please. Also, is it silver inside the doorsill at the bottom, or blue?

JuddezJul 16, 2012, 2:09 am · #27

Will do Jason.
Rubstrips were pulled off ages ago sorry. Bottom is silver. People seem to like this colour scheme. Kind of thinking I should have just given it a re-paint in factory colours...

ArroJul 16, 2012, 2:46 am · #28

even better if the rubstrips are gone, because I want to see exactly where the color cutoff line sits.

Wait... that isn't factory?

JuddezJul 16, 2012, 2:57 am · #29

Yea thats factory. Im planning on repainting it Nissan purplish Blue. I cant remember colour code off hand (have it written down somewhere). I'll try and get them for you tomorrow. Will send you links Via PM

ArroJul 17, 2012, 12:04 am · #30

You rock man thanks :thumbsup: