ive gotten a few request to share how i rattle canned my car. rather than writing several pm's i thought id just do a write up. i dont know if this is in the right spot so mods if this is in the wrong section, sorry.
so to begin-
MATERIALS
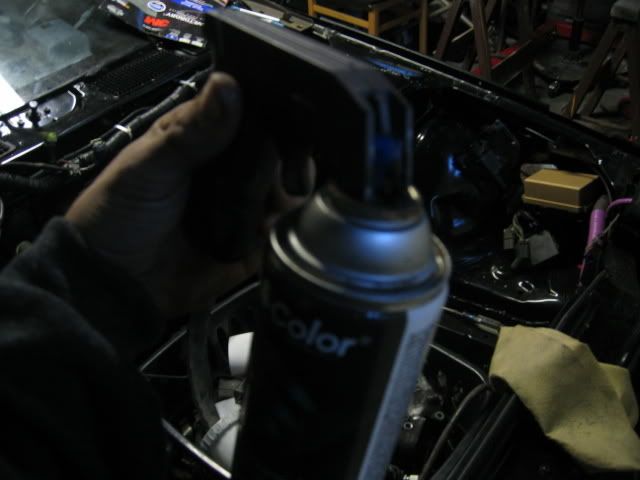
***spray can handle thingy
***primer(optional)see pic-6cans should do it i got like 10 just in case
-i used primer to fill in minor scratches and to prevent the old paint from bleeding through
***color of your choice
-i learned that 5 cans will cover the whole car with 1 medium coat. i sprayed 2 medium coats so i used about 12 cans.
note: i went through more paint than i should have cause i painted outside. i kept getting bugs and dust in the paint so i had to go back over it a few more times.
i played around with duplicolor and liked the wide fan spray that rustoleum lacks, you could use duplicolor or rustoleum, your choice. they both will gloss the same when buffed.
***buffer
-see pic must use variable speed buffer
see the speed control, set at 1000rpms, anything faster may burn through the paint
do not try to use a polisher to rub out your paint job, a polisher is like this
a polisher will not cut like a buffer. for the end results like mine use the buffer.
***buffer back up pad and compounding pad-see pic- 3m yellow pad 3m part number 05723

***any type of rubbing compound. i used 3m's trizact spot finisher. i feel more comfortable with this product due to the cutting speed. its a low cut so it takes some serious elbow grease to burn your paint. this is awsome stuff. i was told this is equivalent to 3000grit paper but in a rubbing compound form.
***sand paper
5 sheets of wet or dry 320g
5 sheets of wet or dry 600g
5 sheets of wet or dry 1500g
2-3 sheets wet or dry anything higher than 1500, i went with 2500. 2500 may be hard to find so you can settle with 2000g.
***sanding pads
pretty much anything that will help you distribute even pressure across the paper. using your hand will cause it to look wavy and may nic the paint. i found a fresh sponge to work great.
***masking tape
3/4in wide- 1-2rolls
2inch wide- 1-2rolls
***wax/grease remover 3m number 08983
***bucket, water, dish soap
MASKING 101
MASKING-the quick run down
mask for primer spraying and for final color
remove anything that can be removed
mask everything else off with nice thick paper or plastic- start by using masking tape to border the very outer edge of what you are masking off. when it comes to corners, run your finger along the outer edge of the tape to steer it in the masking direction. now take you paper or plastic and cover the mass area. do not over lap the taped border, rather meet the inner edge of the tape you laid down. then get the masking tape and seal it up. tape the edge of the sheeting to the tape border. best for windows.
now comes back taping. back taping is simply just taking the tape and folding a portion of it to creat a non sticking edge. see pic
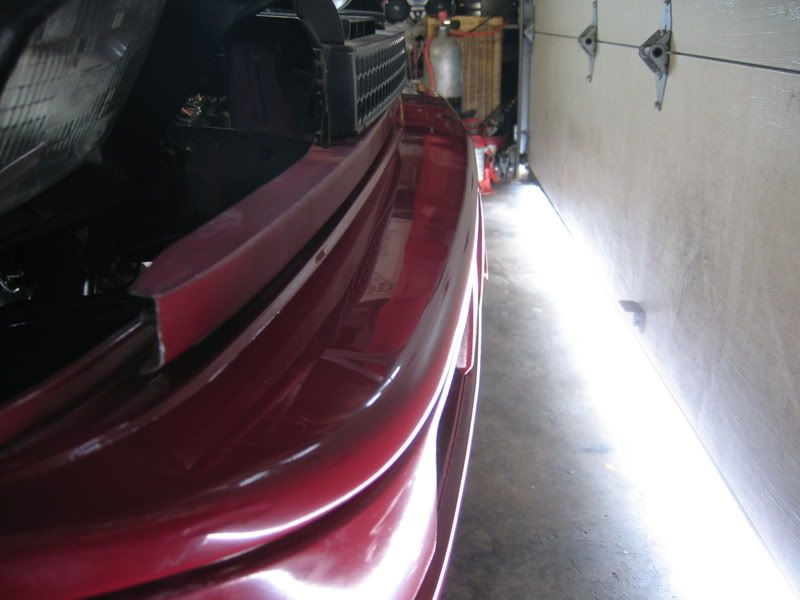
back taping is used to prevent hardlines. its also how you want to tape the gaps in the bodylines. heres my example
a hardline tape job, what not to do,
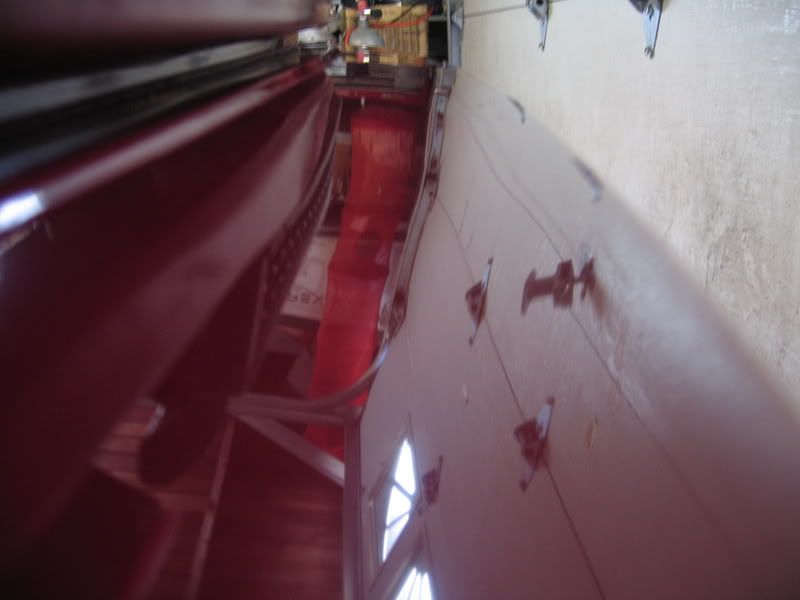
the right way is to back tape and run the folded tape edge along the edge of what your masking. here it would be the roof. this would allow paint to blend into the gap so when the doors closed it looks painted in the jamb

use this technique for the doors, hatch, fenders and hood.
PREP + SPRAYING...
1. i would first recomend washing the entire car, that means wiping down all the jambs, cleaning in the wheel wells ect.
2.remove all necesary objects that are removable and mask anything you dont want to paint
i.e.lights, grille, trim, windows
3.pull out the 320g i listed in materials and get your bucket ready. dispense about a dime size of dish soap in the bucket. this will extend your paper life. fill with water. always let paper rest submerged in water for about 15mins to soften it up. note: soap is not needed but its something i like to do.
4. now go over the whole car with the 320g. sand in circular motions applying equal pressure. remember you should be wetsanding. dont sand all the way through the factory coat. just get the surface scuffed up and free of any scratched not cause by the sandpaper. let dry and you will see where you sanded. it will be dull. any shiny area should be gone over and sanded. after all sanding is complete use the wax/grease remover and wipe over the entire car. let dry and wipe down again. the surface can never be too clean. try not to put finger prints on the car as it possibly could contaminate your clean surface.
5. now that the car is sanded with 320g its time for primer. dont spray it heavy, it will run and not dry right. may cause the color to peel if you spray it too heavy. spray several light coats. wait 2 minutes between each light coats to allow primer to dry.
note:several light coats will build higher than a few thick coats, high build is key to not having scratching in finish.
6. so the car is primed and ready for color. now what? well the primer should feel rough to the touch. so pull out some 600G and start getting it smooth. you are elimating all the orange peel so the color has a smooth surface to stick to. do the entire car again. it sounds like a lot of sanding but after a while you get used to it and you get better so it goes by quicker. you may start with 320g but always finish your primer with at least 600g. now again use the wax/grease remover and wipe down the entire car. get all the hard to reach areas. let dry and wipe down once more. no finger prints, may cause fisheyes. now if you arent partially masked yet begine to mask off area you dont want paint to get to. i didnt take the time to mask and all i could say is overspray got everywhere. i spent more time cleaning overspray than actually prepping the car. so take your time and mask it off.
note: the better job you do here with the primer wetsanding the less you will have to color sand the car later on. the key is to get the surface as smooth as possible so when the color gets laid it wont follow the rough texture the primer had before you sanded it.
7.so the primers sanded smooth, finally time for color. shake the cans well. always start from the top edge of whatever panel your spraying and work your way across and down. again spray with light coats. from my experience i noticed spraying from 8 -10 inches away worked best. you may not get fast coverage but it will look more uniform. spray one panel at a time. allow 2-3 minutes between coats, more if sprayed heavier. repeat on the same panel until you have a nice thick, even color. by now you got enough paint to cover but probably not enough to color sand safely with. you may move on from here but i sprayed more. 1 more light coat, let dry for 3 mins, then give it a medium coat. you should be spraying more color on this coat than other. let dry over night. it will take at least 24 hours to dry completely, or enough to color sand with.
note: waiting in between coats is crucial. runs will begin to form if there is no drying period between coats. the paint builds and gets too thick to support itself vertically and will run.
COLOR SANDING AND BUFFING
depending on how smooth your color came out this may vary. if rough use 600g to just skim the surface. then get 1000g or the 1500g and wetsand all the color on the car. circular motions, light pressure. let the paper do the sanding. if it came out smooth just go right to 1500g. dont sand through the color. test it a little. sand a area for a short while and let dry. once dry you will see the orange peel. if it has orange peel keep sanding until smooth. keep letting it dry to see how it looks. once the whole car is color sanded look it over. if it is sanded good enough you should be able to look at the car from an angle and see the gloss starting to appear.
so the car is color sanded and its ready to be rubbed out. this is the hardest part. chances are you may burn through the paint. do not hold the buffer in one spot for to long. work the buffer around the panel, keep it compounded. dont let the compound dry.
this is where the yellow foam pad is needed.
using the buffer is pretty straight foward. stick on the pad, set to 1000rpms. nothing faster! get the compound and use about a quarter size for a 2sq.ft area, work it arond until it almost dries up. it should look really glossy. if not use another dip of compound and go over that area again. work a panel a time until its completely rubbed out and glossy. then move on. if your not getting a good gloss after you compound it you may have to go back and color sand some more. get the whole car rubbed out then wipe off any excess compound. pull out some good carnuba wax and wax it that day! the wax acts as a sealer for the compound. if you decide to use something other than trizact you may have to use a 2nd compound called a glaze. most rubbing compounds are followed up by final glaze but thats what i like about the trizact. it doesnt need a glaze, just a nice coat of wax. though you can glaze it, its not necasary like a rubbing compound. thes another pad you can get to finish it up even more. its a black foam pad used for polishing. its softer than the yellow and is also used with the trizact. i havent used that pad on my car yet but i will once i finish my build. the black pad will take out the super fine swirl marks left my the yellow pad if too much pressure was used. if your good enough with the yellow pad you dont need this.
like said above a polisher will not work. it may give the finish a semi-gloss but a real buffer is where its at. all in all good results from a rattle can come from the color sanding and buffing. many will argue its not worth it or its too much work. well if your pockets arent stuffed with $100's and you have nothing to do over a weekend then spray away. its a awsome alternative to urethane. its good experience and easliy maintainable. if it ever starts to look old no need to pay to have it matched and resprayed at a shop. simply go to home depot, buy a few cans and you know what to do. if i missed anything or you are still unclear of the process i will answer questions here and update the write up
my finished results. well one side at least. i put the car in the garage after i took this picture and i havent started to color sand and buff the drivers side, roof and hood. as seen in the taping pics above you can see the dull finish, thats not color sanded, thats how it looks once it dries after you spray it. you can see the wavy panels, thats from me not using a backing pad when i was color sanding. also i didnt color sand or buff the rocker cause i have a se lip kit going on. 
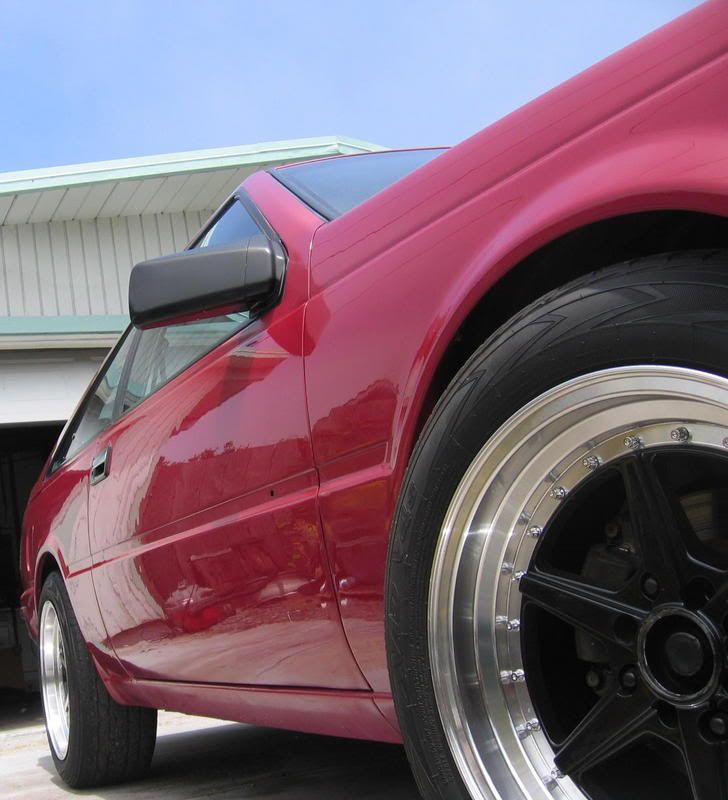
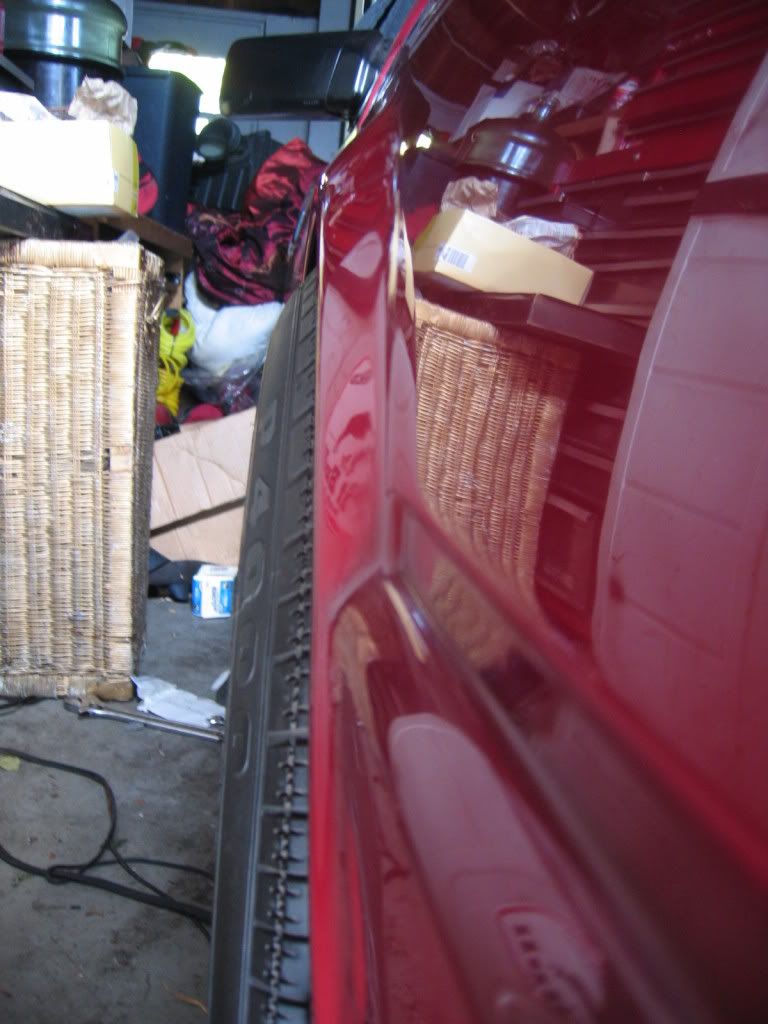
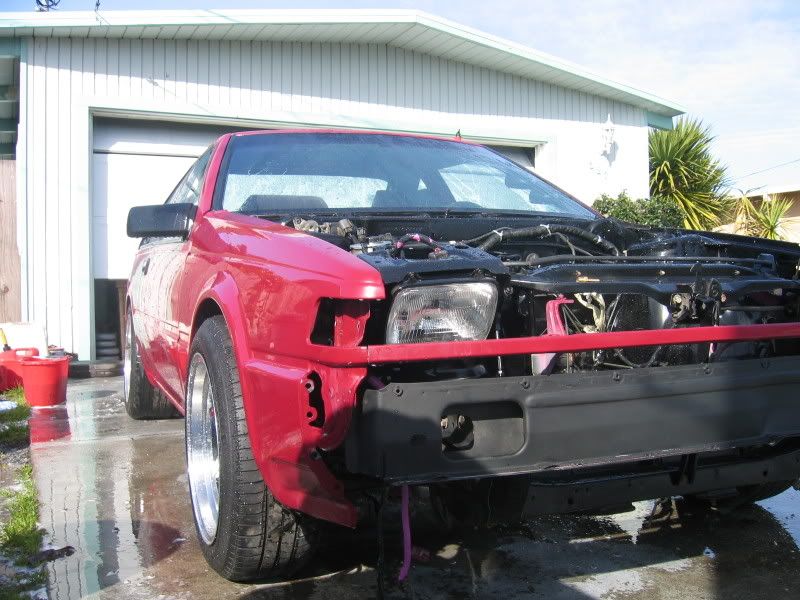
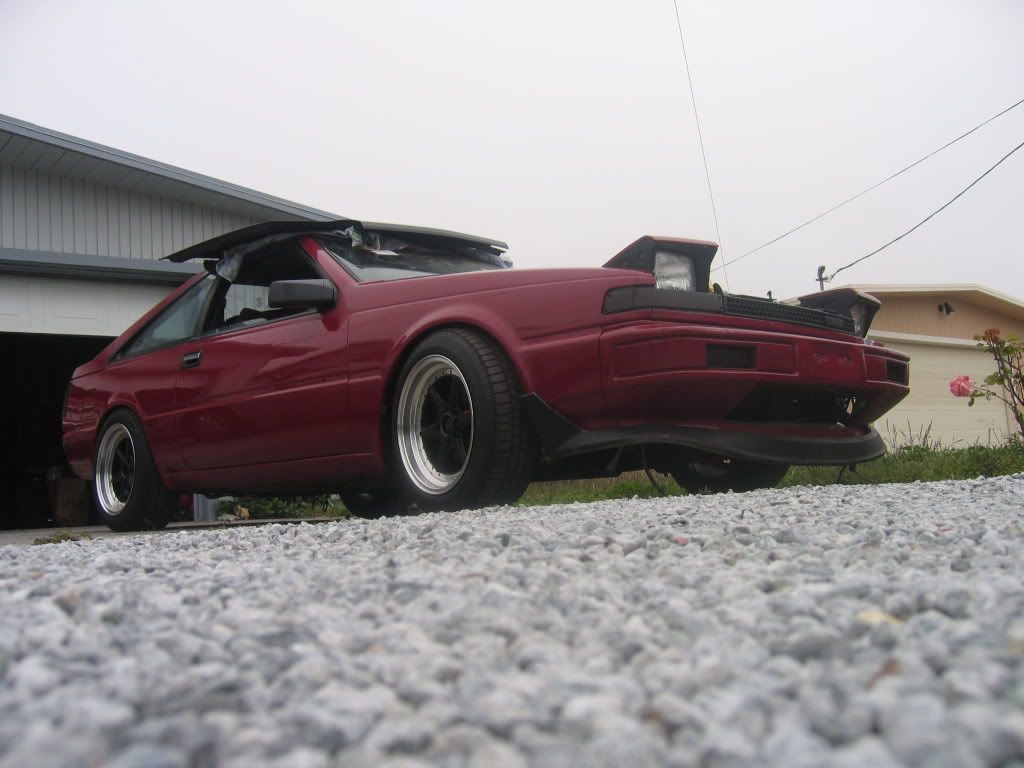
edit: if you sand through to bare metal be sure to spray self etching primer to prevent rust.
also if you are looking for a great place to buy some autobody stuffs check this place, they have alot of nice stuff at great prices. shipping fast too. for example, my satajet 3000 through my shops paint rep runs around $700. they sell the same gun for $550
the site is... www.autobodytoolmart.com check them out
Browse › Tech ›Visual mods and audio
How To: Rattle Can Your Car-spray Paint
WOW!finished product look REAL nice!
good write up i like the idea of being able to just do touch ups by just going to home depot if you scratch somthing.
One suggestion you way want to get one of those nifty handles to attach on top the spray can its just easyier
awesome tutorial. move this to Visual and sticky it
JackalopeWOW!finished product look REAL nice!oh i forgot to add that. i used one they are real nice.
good write up i like the idea of being able to just do touch ups by just going to home depot if you scratch somthing.
One suggestion you way want to get one of those nifty handles to attach on top the spray can its just easyier
julieawesome tutorial. move this to Visual and sticky itgreat write up!
Great writeup bro
sticky material
agreed....
how much time do you budget for a project like this?
I've never seen one of those spraycan handle thingies, can you put a can on it and take another picture?
caraudiofooleryagreed....it can easily be done in a weekend. maybe a day with 2 or more people but you still got to let it dry overnight so you can color sand. i tried sanding the color after a few hours, it just gummed up the paper and gouged the finish.
how much time do you budget for a project like this?
ArroI've never seen one of those spraycan handle thingies, can you put a can on it and take another picture?picture added
great write up!
we needed something like this.
and wow the car looks great.
im gunna be painting mine flat black & all this info is extremely appreciated.
thanks silvia love .

Cool, I'm gonna have to get me one of these soon. I paint lots of little parts, this will be far easier on things.
Another useful tip for those who would rattlecan paint:
Fill up a bucket with hot water. Put your cans in the bucket. Or on a hot summer day, place your cans outside for 15-20 mins.
The hotter cans raise internal pressure, and atomize the spray better for a more even coat.
I got that from SCC magazine, actually. When they flat-blacked a WRX.
Arroshoot i wish i would have known that. i think thats also why i used so many cans. i would run out of pressure like 3/4 the way through the can so id have to toss a 1/4 filled can. when the cans are full they spray great but when they start to empty they spit and sputter really causing a mess. im gunna have to try that trick.
Cool, I'm gonna have to get me one of these soon. I paint lots of little parts, this will be far easier on things.
Another useful tip for those who would rattlecan paint:
Fill up a bucket with hot water. Put your cans in the bucket. Or on a hot summer day, place your cans outside for 15-20 mins.
The hotter cans raise internal pressure, and atomize the spray better for a more even coat.
I got that from SCC magazine, actually. When they flat-blacked a WRX.
Well it worked great for me and I've been doing it ever since I read that back in '03.
i might be doing my car this weekend, so this is good for reference
im either doing krylon true blue and flat black or krylon satin olive and flat black
either way i hope it comes out half as good as yours! get more pics of that thing when youre done, looks sweet
nice write-up
im a proffesional painter and thats a really good write up, its also the best spray can paint job ive ever seen! good job!
He's right about the duplicolor cans, they have a much better spray pattern than the rustoleum cans.
I did my car with rustoleum and my sister's roof with duplicolor and hers went down much smoother than mine did.
im impressed how it turned out the only thing i worry about is how long will the shine last until you need to rebuff or repaint
bartc_jim impressed how it turned out the only thing i worry about is how long will the shine last until you need to rebuff or repaint
Yeah, obviously it's not going to last as long as a factory job, or a good professional job... but that's the tradeoff for it only costing $50-$100 in paint & supplies
Empedocles99Yeah, obviously it's not going to last as long as a factory job, or a good professional job... but that's the tradeoff for it only costing $50-$100 in paint & supplies
im aware of that but what kind of life span could you expect...
Have you guys heard of the $50 paint job? search it up on Google...
supposedly you mix house paint with mineral spirits till you get a very thin, milky mixture, then you use a roller and Roll the paint onto the car... with it as thin as it has to be, you'll end up having to do a few coats, but it supposedly outlasts most factory jobs and looks pretty damn good
I love these easy $100 fixes for paint when i go to paint me s12, ill keep this thread in mind
any tips for an even satin finish?
i want to paint my cressida satin black, sort of a "suede" finish
caraudiofooleryany tips for an even satin finish?
i want to paint my cressida satin black, sort of a "suede" finish
cressida is so tight.
VG30_S12Have you guys heard of the $50 paint job? search it up on Google...
supposedly you mix house paint with mineral spirits till you get a very thin, milky mixture, then you use a roller and Roll the paint onto the car... with it as thin as it has to be, you'll end up having to do a few coats, but it supposedly outlasts most factory jobs and looks pretty damn good
I love these easy $100 fixes for paint when i go to paint me s12, ill keep this thread in mind
I tried the roller paint method, it sucks, way too hard to get the paint to lay flat. I rattle canned mine and it turned out far better.
awesome job joe!
caraudiofooleryany tips for an even satin finish?
i want to paint my cressida satin black, sort of a "suede" finish
I think if you cover a flat black with a clear coat or sand it with fine grit paper (1000 grit, then 2000 grit) it'll have a bit more sheen than plain flat black.
I used rustoleum flat black, and it looks like this:

These guys are using tractor paint, looks even better:
http://www.crankshaftcoalition.com/wiki/Jo...itz_Black_paint
http://www.hotrodders.com/forum/attachment...tachmentid=7584

flat blue
nice
moved from the coffee shop and pinned. great write up
JOM, is that your car? approximately how long does it take to paint a car in this fashion?
my guess is that when the paint fades, youd just sand the surrounding area, and repaint
Howlong ago did you paint your car SilviaLove? any noticable signs of fade or anything?
heres the $50 paint job roller method mentioned earlier in the thread
http://board.moparts.org/ubbthreads/showfl...part=1&vc=1
yes, thanks silvialove. great write up. now i gotta figure out a color
Dougim a proffesional painter and thats a really good write up, its also the best spray can paint job ive ever seen! good job!im a apprentice painter and the dudes i work with couldn't believe that it was out of a can.
bartc_jim impressed how it turned out the only thing i worry about is how long will the shine last until you need to rebuff or repaintthats my concern aswell. thats also the reason i chose a tone of red. red pigaments fade faster than any other color. so if the red last around a year than i'd expect any other color to last a few more months.
the trizact stuff i used should help the paint lifespan. it kinda acts as a glaze or a temp clear coat. i swear by that stuff, its great for all paints. it will remove paint transfer, oxidation and scratches.
VG30_S12your correct on the re-spraying.
my guess is that when the paint fades, youd just sand the surrounding area, and repaint
Howlong ago did you paint your car SilviaLove? any noticable signs of fade or anything?
i painted it around june of 07. i havent seen any signs of fading and the shine is still there. i messed around with the paint by pouring gas on it. i thought it would stain it or something but nothing happened. i washed it serveral times with different soaps and it still looks good. i had the car parked outside for about a month before i brought it in the garage and i dont see any damage yet. where i live though i never see's temps hotter than 75, so hotter area's probably will fade faster. i guess im gonna have to wait it out and see how long it last.
VG30_S12JOM, is that your car? approximately how long does it take to paint a car in this fashion?
my guess is that when the paint fades, youd just sand the surrounding area, and repaint
Howlong ago did you paint your car SilviaLove? any noticable signs of fade or anything?
definitely not my car, but i think the flat blue looks ridiculously clean
my friend does the paintroller method and his paintjobs look incredible, couldnt believe it when he told me he just did it with a can of rustoleum. ill try to get some old school pics of his corolla that was almond. he did it again in like ups brown but didnt like the way it came out so he didnt sand it and it looks like shit =/
Nice write-up!
I'm totally doing this to both cars as soon as it warms up.
How much did it cost you, if you dont mind me asking?
I like the flat blue car EXCEPT for the painted side window mouldings.... doesn't line up with the UN-painted mouldings of the doors.
Why not use a few coats of rattlecan clearcoat on top and buff? ou'd ave to let each coat cure, orit would come out milky, but it might help the longevity of the color paint.
I'm a bit cinfused about how foling the tape over gives clean lines, wouldn't if make them messy because the tape isn't flat against the surface?
ArroI like the flat blue car EXCEPT for the painted side window mouldings.... doesn't line up with the UN-painted mouldings of the doors.
I noticed that too. Ur right it bugs. IDK which would look better, leavin the moulding black or painting it all.
Got tip on " Tips" go to a site called artcrimes.com go to products. This site selles all kinds of tips with different spray patterns...take your pick. The best thing about tips is almost no drips or spats,and the paint is gone B4 the pressure!!!
fxdGot tip on " Tips" go to a site called artcrimes.com go to products. This site selles all kinds of tips with different spray patterns...take your pick. The best thing about tips is almost no drips or spats,and the paint is gone B4 the pressure!!!
when i use to do graffiti art i used montana or belton cans wit "new york fat" caps the spray dot is about the size of a 4-5 inches in diameter "flair tips" seem to wotk great" but a new york fatty will drain a rattle can pretty quickly. ant thing with a "thin affixed to it wont work to paint a car. i.e ny thins german thins.
well i dont know how well those 2 ^ would shine up. i used rustoleum cause it has that nice gloss, same with duplicolor.
FOR CARS DEF RUSTOLEUM OR DUPLICOLOR. DUPLICOLOR WORKED GREAT
' ON MY FENDERS AND BUMPER
EightySix200SXFOR CARS DEF RUSTOLEUM OR DUPLICOLOR. DUPLICOLOR WORKED GREATgot any pics?
' ON MY FENDERS AND BUMPER
EightySix200SXwhen i use to do graffiti art i used montana or belton cans wit "new york fat" caps the spray dot is about the size of a 4-5 inches in diameter "flair tips" seem to wotk great" but a new york fatty will drain a rattle can pretty quickly. ant thing with a "thin affixed to it wont work to paint a car. i.e ny thins german thins.
That site haz all your fav tips and if its been a while since you been there they may have new different tips
lol this isnt rattle can.....but my very first car has horrrrrible paint so I decided to paint it with house paint..........house paint + sponge roller = not bad haha
Im telling you all, RUSTOLEUM & DUPLICOLOR FTW. i just sprayed my front bumper last night, wow. i'll got some pics of it later.
duplicolor makes like 400 factory colors in aerosol, i just found that out.
Hey Sil-Love I followed everybit of what you wrote (well except the part where you said to you a buffer at 1000 rpms only had a small dewault grinder with a 10 in buff pad) and the results where awesome man. Although I wasn't gonna try it on my car so I did it on my wife's sentra first. I figured it looked more like shit than mines with all that clear flaking off and rust on the roof. Awesome walkthrough man.
Didn't have enough paint for the whole car just did the top.
Imagine this all over the top and hood and trunk
after wetsand and quick buffing
thanks again sil for the write up
So i went to autozone bought some paint and painted my car what do you think.
My Webpage
s12godSo i went to autozone bought some paint and painted my car what do you think.id give my opinion except the link doesnt work....
My Webpage
i think here in a few weeks im going to shoot some duplicolor paint shop prizm clear on my s12 to liven things up a bit. i like metallics. the plain burgandy is nice but it needs some more bling to it.
Zitron ErizoHey Sil-Love I followed everybit of what you wrote (well except the part where you said to you a buffer at 1000 rpms only had a small dewault grinder with a 10 in buff pad) and the results where awesome man. Although I wasn't gonna try it on my car so I did it on my wife's sentra first. I figured it looked more like shit than mines with all that clear flaking off and rust on the roof. Awesome walkthrough man.that should be shinning a lot more if you buffed it with a pad. now remember i said in the beginning, its a foam pad i used. a 3m product, its really the only thing that will make it shine like hell, that or a wool pad. wool pads cut faster though so you have to be careful. the trizact stuff too is a great product.
Didn't have enough paint for the whole car just did the top.
Imagine this all over the top and hood and trunk
after wetsand and quick buffing
thanks again sil for the write up
added some pics